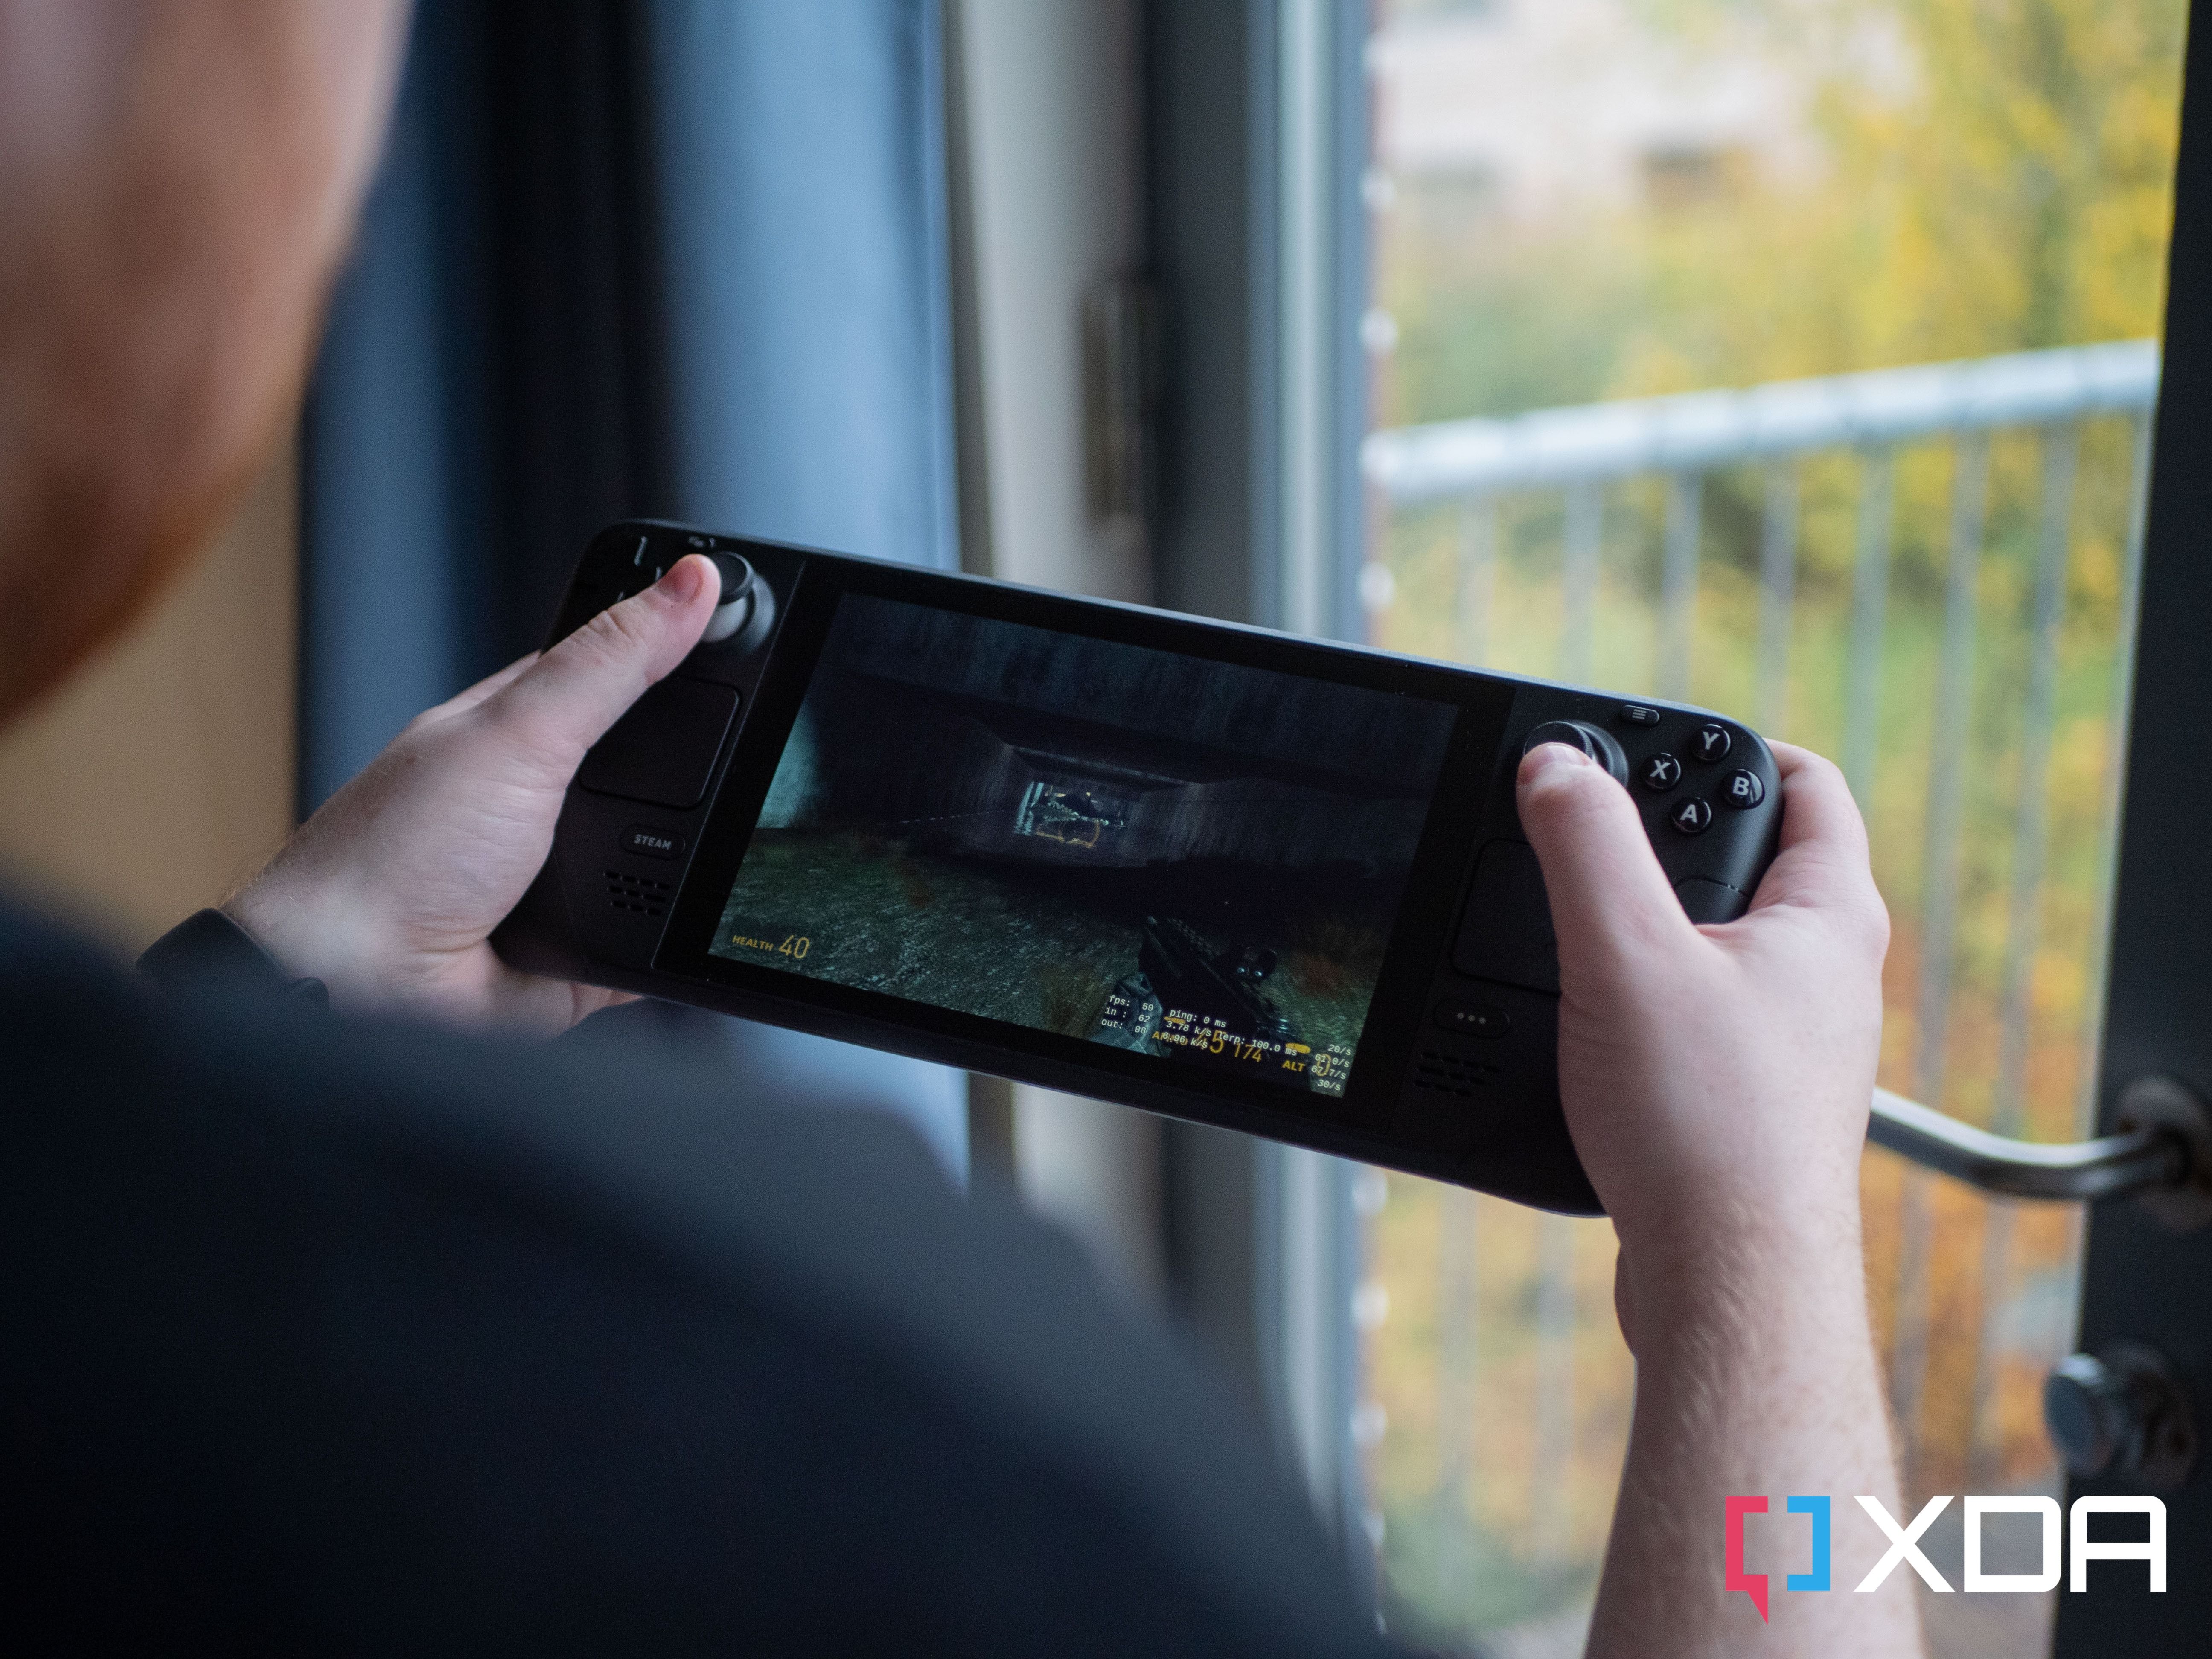
The Steam Deck is a great console, and part of its greatness is its awesome controller. Inspired by the original Steam Controller, it has two haptic touch pads, four back buttons, gyro support, all in addition to the typical buttons you get on a controller. The quality of the Deck's controls is great, and it's a shame it's limited to just the Deck itself.
Except it's not. There are two good ways of getting your Steam Deck to work as a controller for your PC, and one of them isn't even that difficult. Here's how to turn your Steam Deck into a regular PC controller.
Using Steam Remote Play
While Remote Play is intended to stream one PC's gameplay to another, such as from your main PC and onto your Steam Deck, it's also a way to use the Deck as a controller for your PC. This is the simpler of the two methods and the one that will probably work best for most users.
- Make sure the game you want to play is installed on your main PC. If you're trying to play a game that's not on Steam, go ahead and manually add your game to Steam.
- Connect the PC and your Steam Deck to the same network. Your PC can be connected via Ethernet instead of Wi-Fi for better performance.
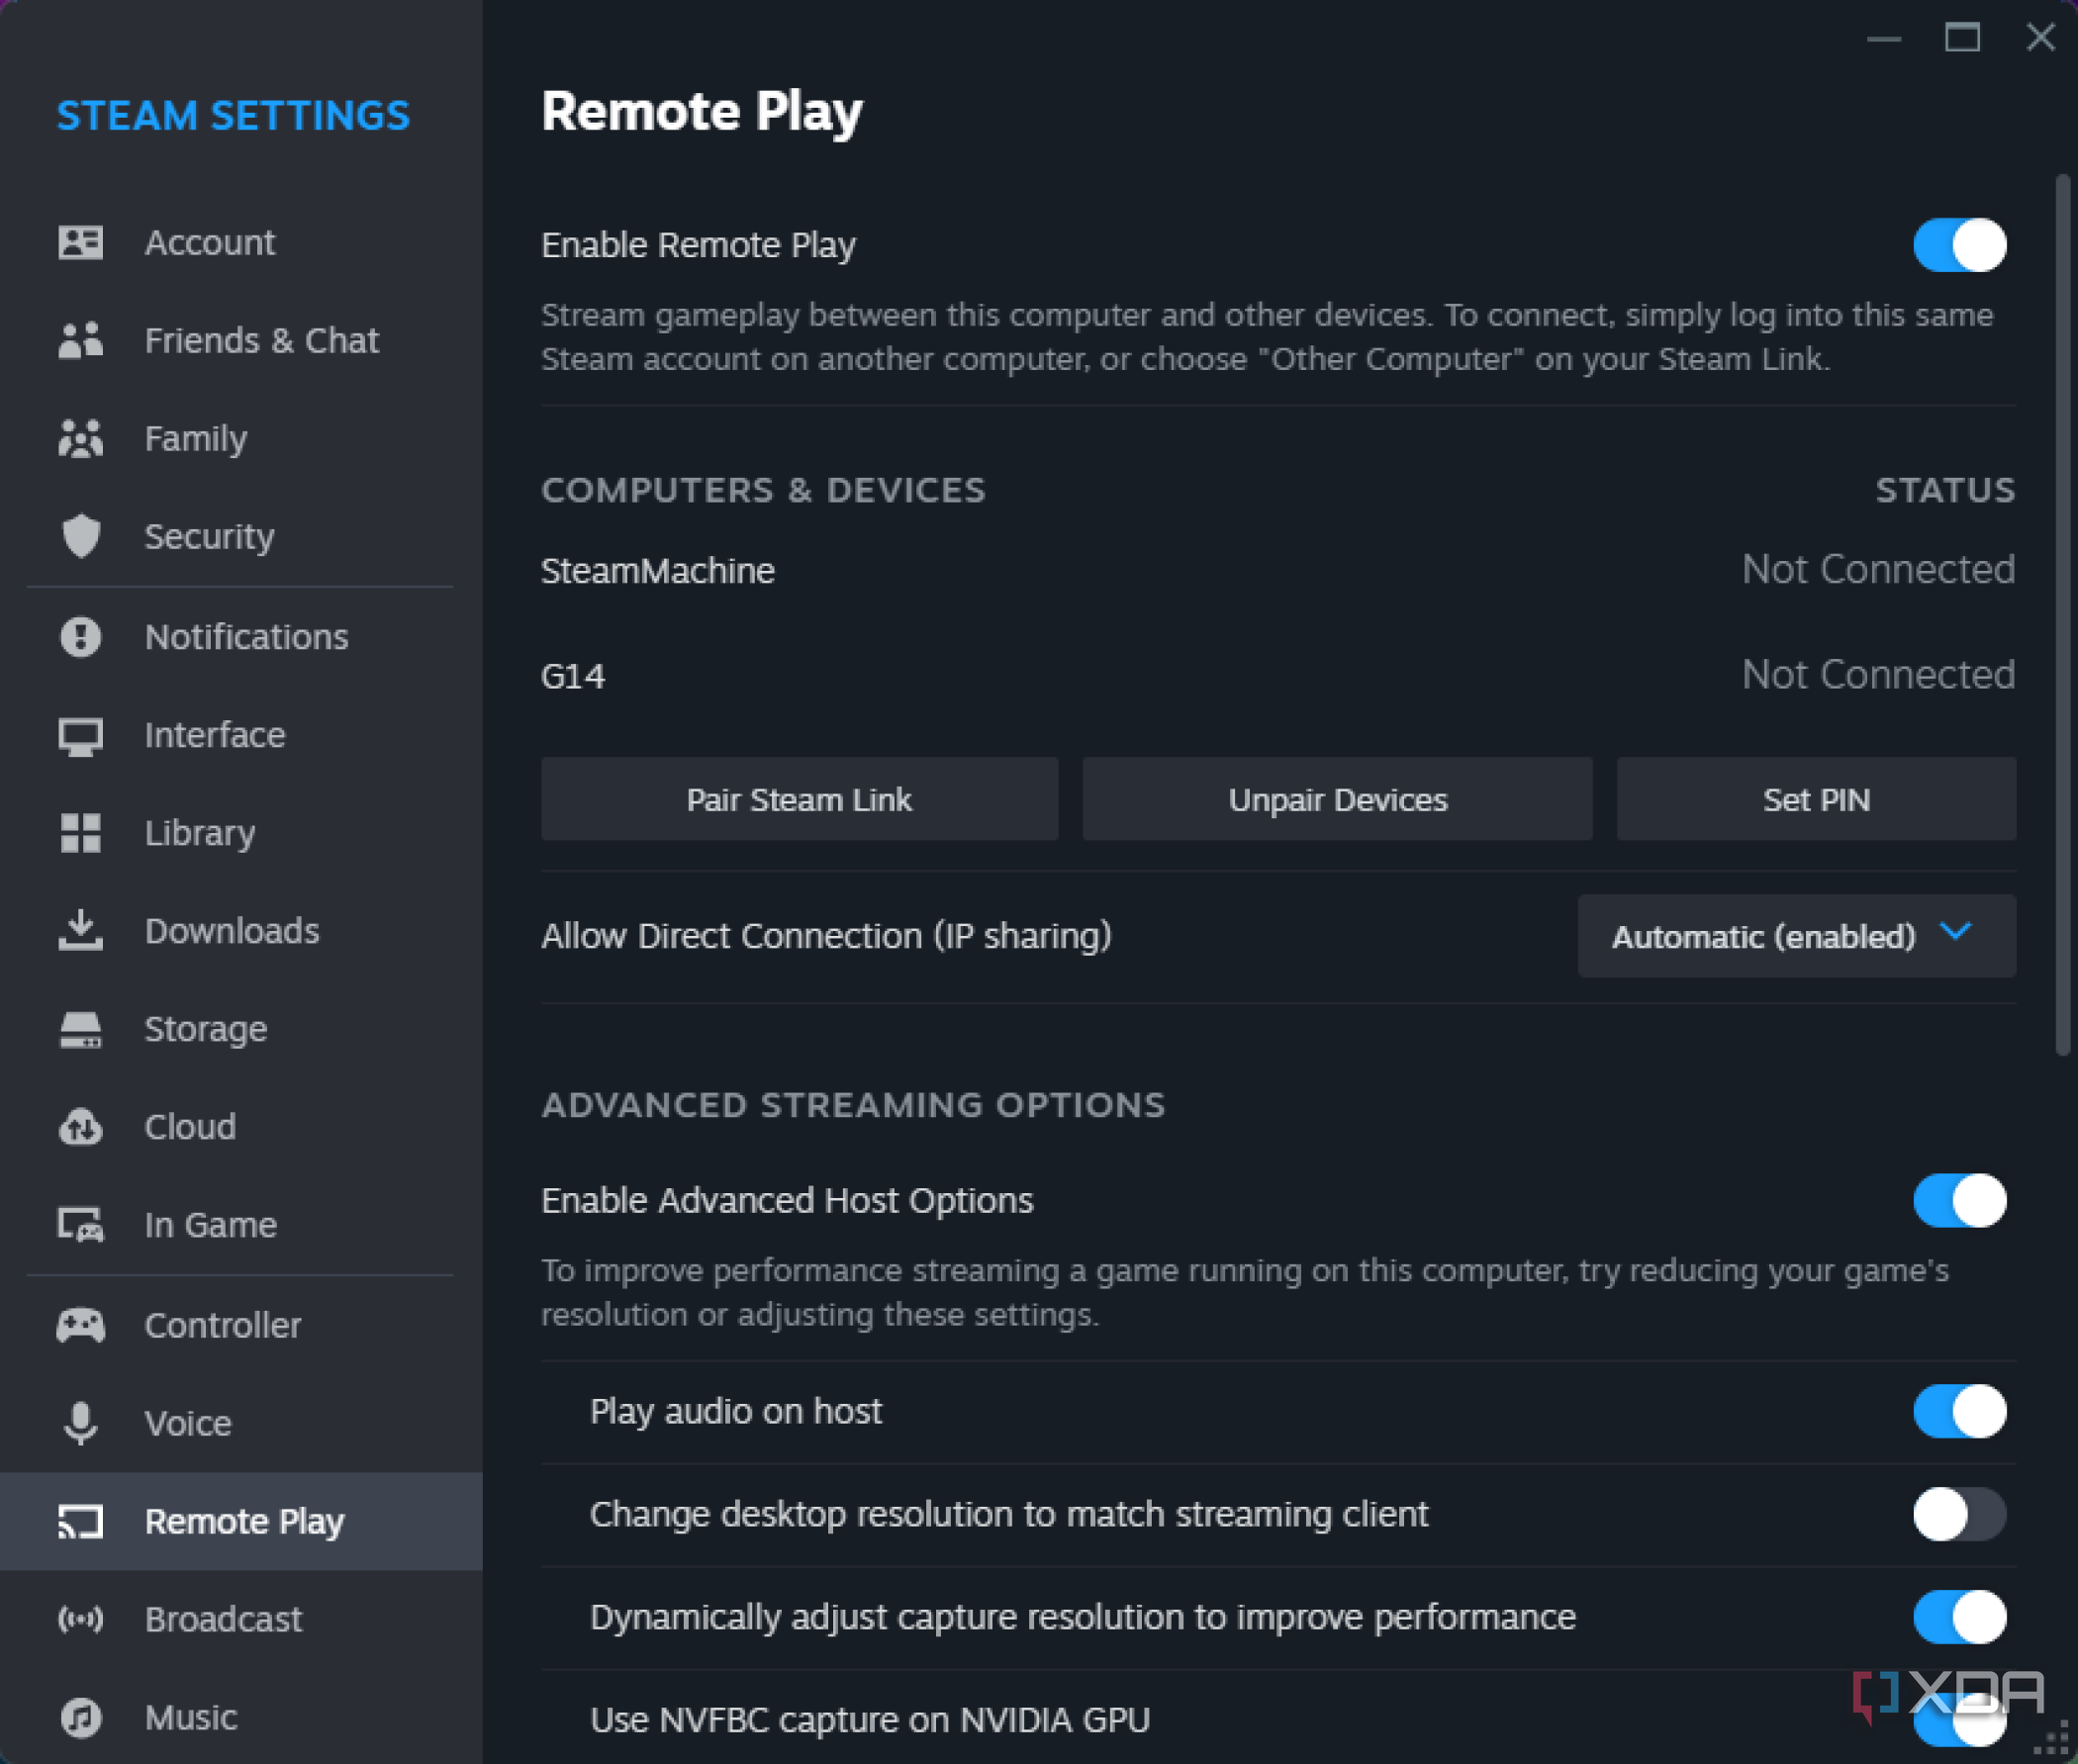
- On your PC, click the Steam icon in the top right, scroll down to Settings, and the Steam settings window should open
- Navigate to the Remote Play tab. Make sure Remote Play is enabled.
- Enable Advanced Host Options, and then enable Play audio on host.
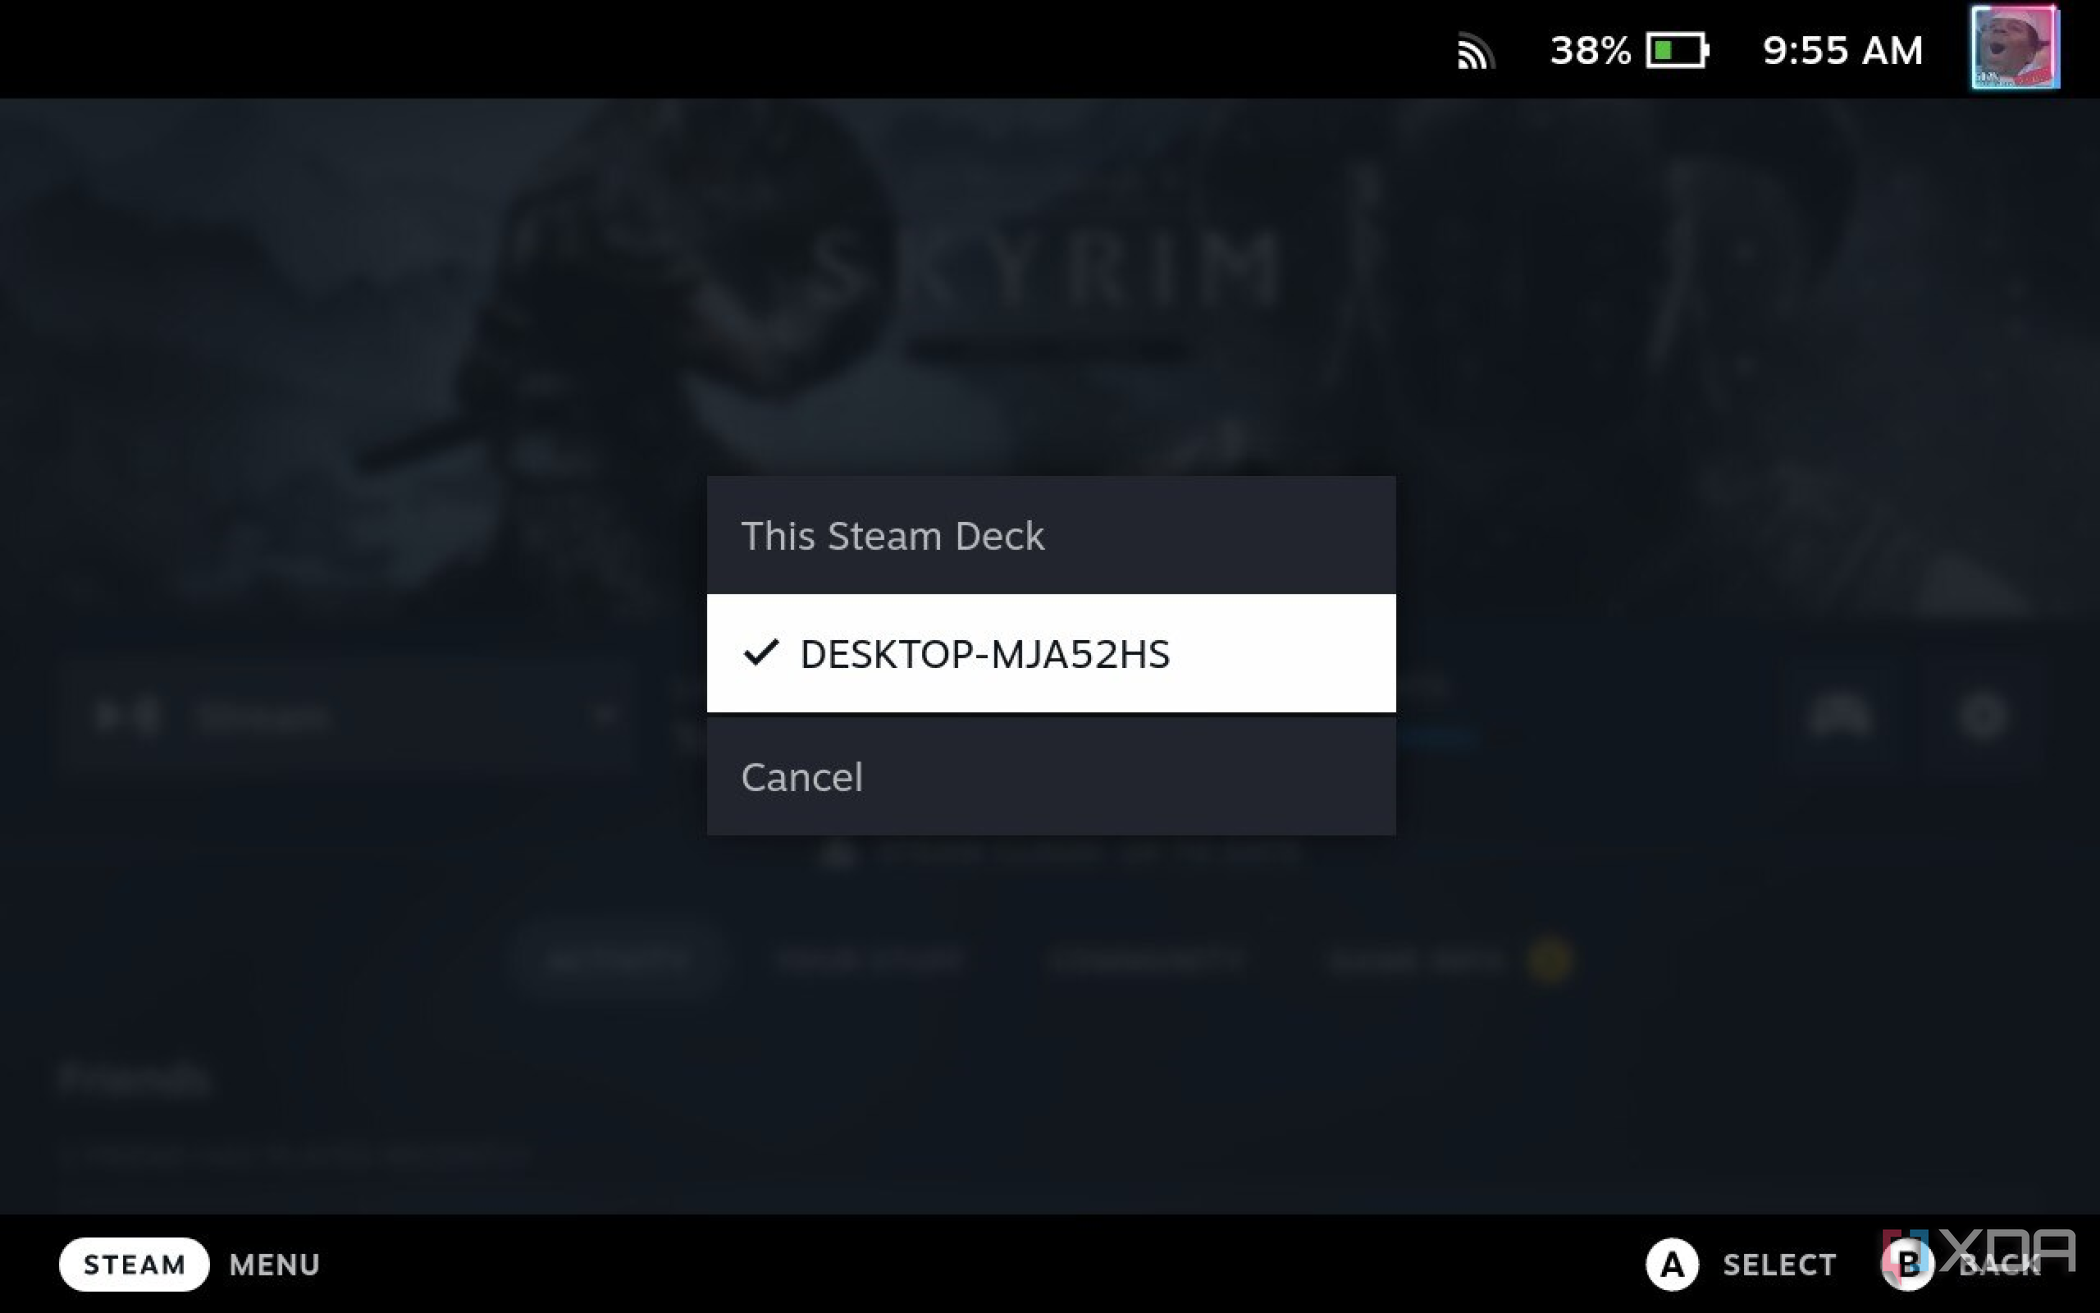
- On your Deck, find the game you want to stream in your library, and select Stream.
- If Play is what you see instead of Stream, click the arrow button next to Play and select to stream from your PC.
And that's all there is to it. Using this method, you'll be streaming gameplay to your Deck but instead of looking at your Deck's screen, you'll be watching your PC's display. This method isn't 100% perfect however, as you won't be able to pull up the Steam overlay on your PC, your screenshots will be made on your Deck, and you don't have a ton of control over your PC.
Plus, this method requires decent Wi-Fi in order to get good latency, and to get good performance on a worse connection you may need to reduce resolution on your Deck's Remote Play settings (which can be found by pressing the Steam button, then going to Settings, and going to the Remote Play tab).
Using VirtualHere to make your Deck a controller
While Remote Play is convenient and works almost out of the box, it's a very bandwidth inefficient way of using a controller and may be laggy or even nonfunctional for users. However, there is a way to make your Deck an actual controller, even though Valve never designed the Steam Deck to be used like that. A very clever Reddit user figured out how to do exactly that in a process that's a little tedious but overall not too hard, and the end result works really well for something that even Valve probably didn't think about.
Setting up the Steam Deck
- Press the Steam button on the Deck.
- Go down to Power and select Desktop Mode.
- First, we need to download the VirtualHere Linux Server. Go to VirtualHere's website and download VirtualHere USB Server for Linux (x86_64).
- Open System Settings, navigate to the Users tab and change your password, which by default doesn't exist. I recommend setting it to something simple.
- Then open the file manager and in the Documents folder create a folder called virturalhere. Make sure it's all lowercase.
- Grab the VirtualHere file you downloaded and put it in the folder.
- Right-click the file, click Properties, and in the Permissions tab click the Is executable box.
- Then, open Steam and click Add a Game in the bottom left corner, then click Add a Non-Steam Game, and click Browse.
- Navigate to the virtualhere folder and switch the file type to All Files, then select the VirtualHere file and click open.
- Click Add Selected Programs.
- Find the entry for the virtualhere file in your Steam library and right-click it in the sidebar, then click Properties.
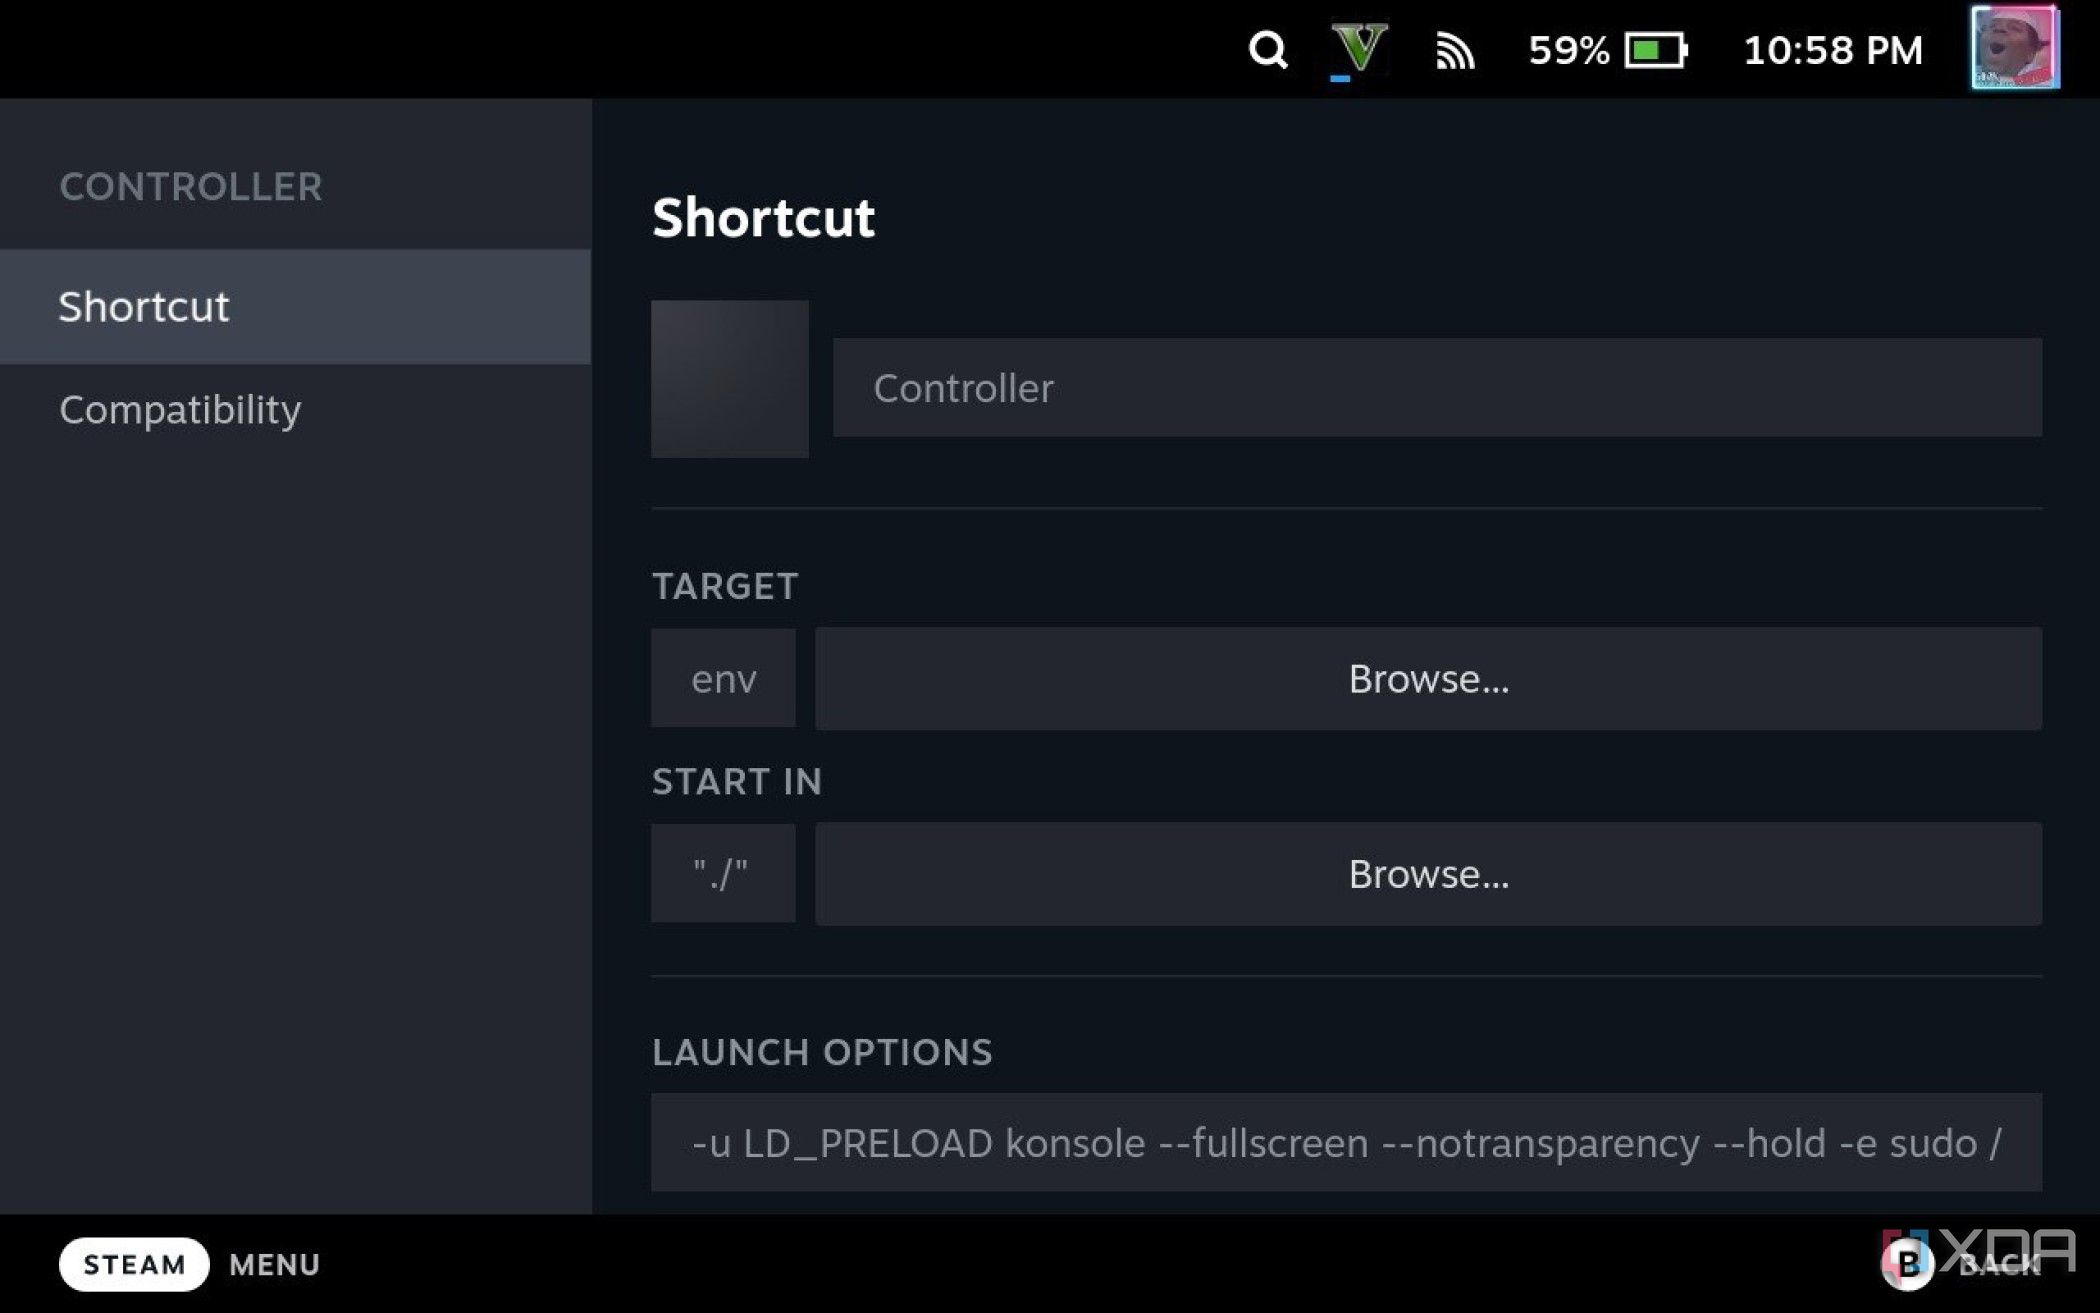
- In the Shortcut tab change the text in Target to:
env
- Change the Start In field to:
"./"
- In Launch Options paste this:
-u LD_PRELOAD konsole --fullscreen --notransparency --hold -e sudo /home/deck/Documents/virtualhere/vhusbdx86_64
- Rename the app to something like Controller and maybe add an icon if you want.
And that's all you need to do on your Deck. Now let's move on to what you have to do on your PC.
Setting up your PC
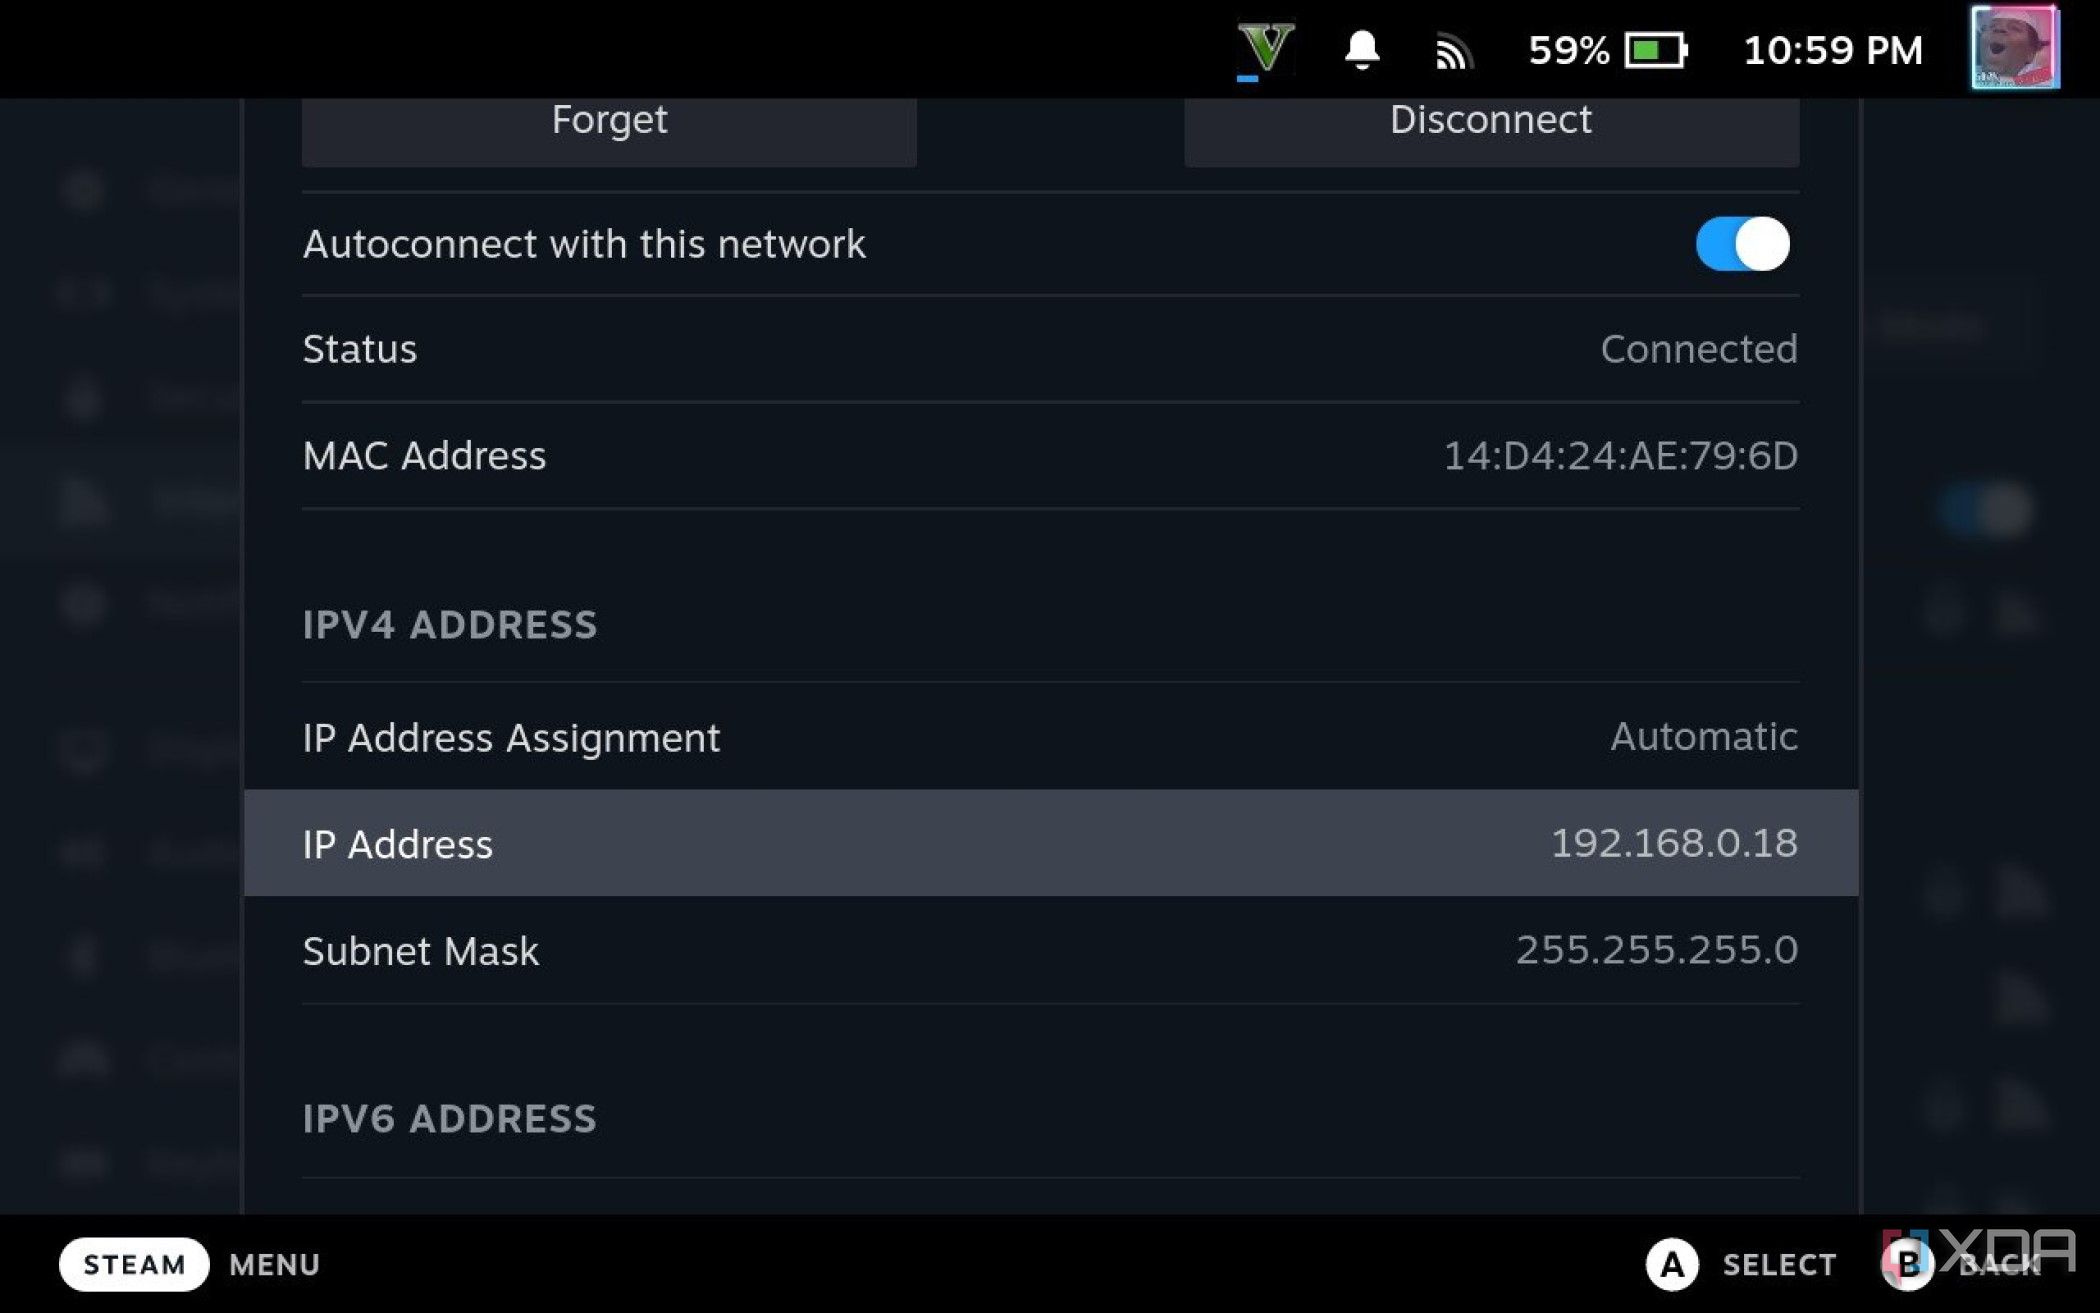
- First, go to your Wi-Fi settings on your Steam Deck, press A on or touch the network you're currently connected to, and note down your Steam Deck's IP address. It should start with 192.
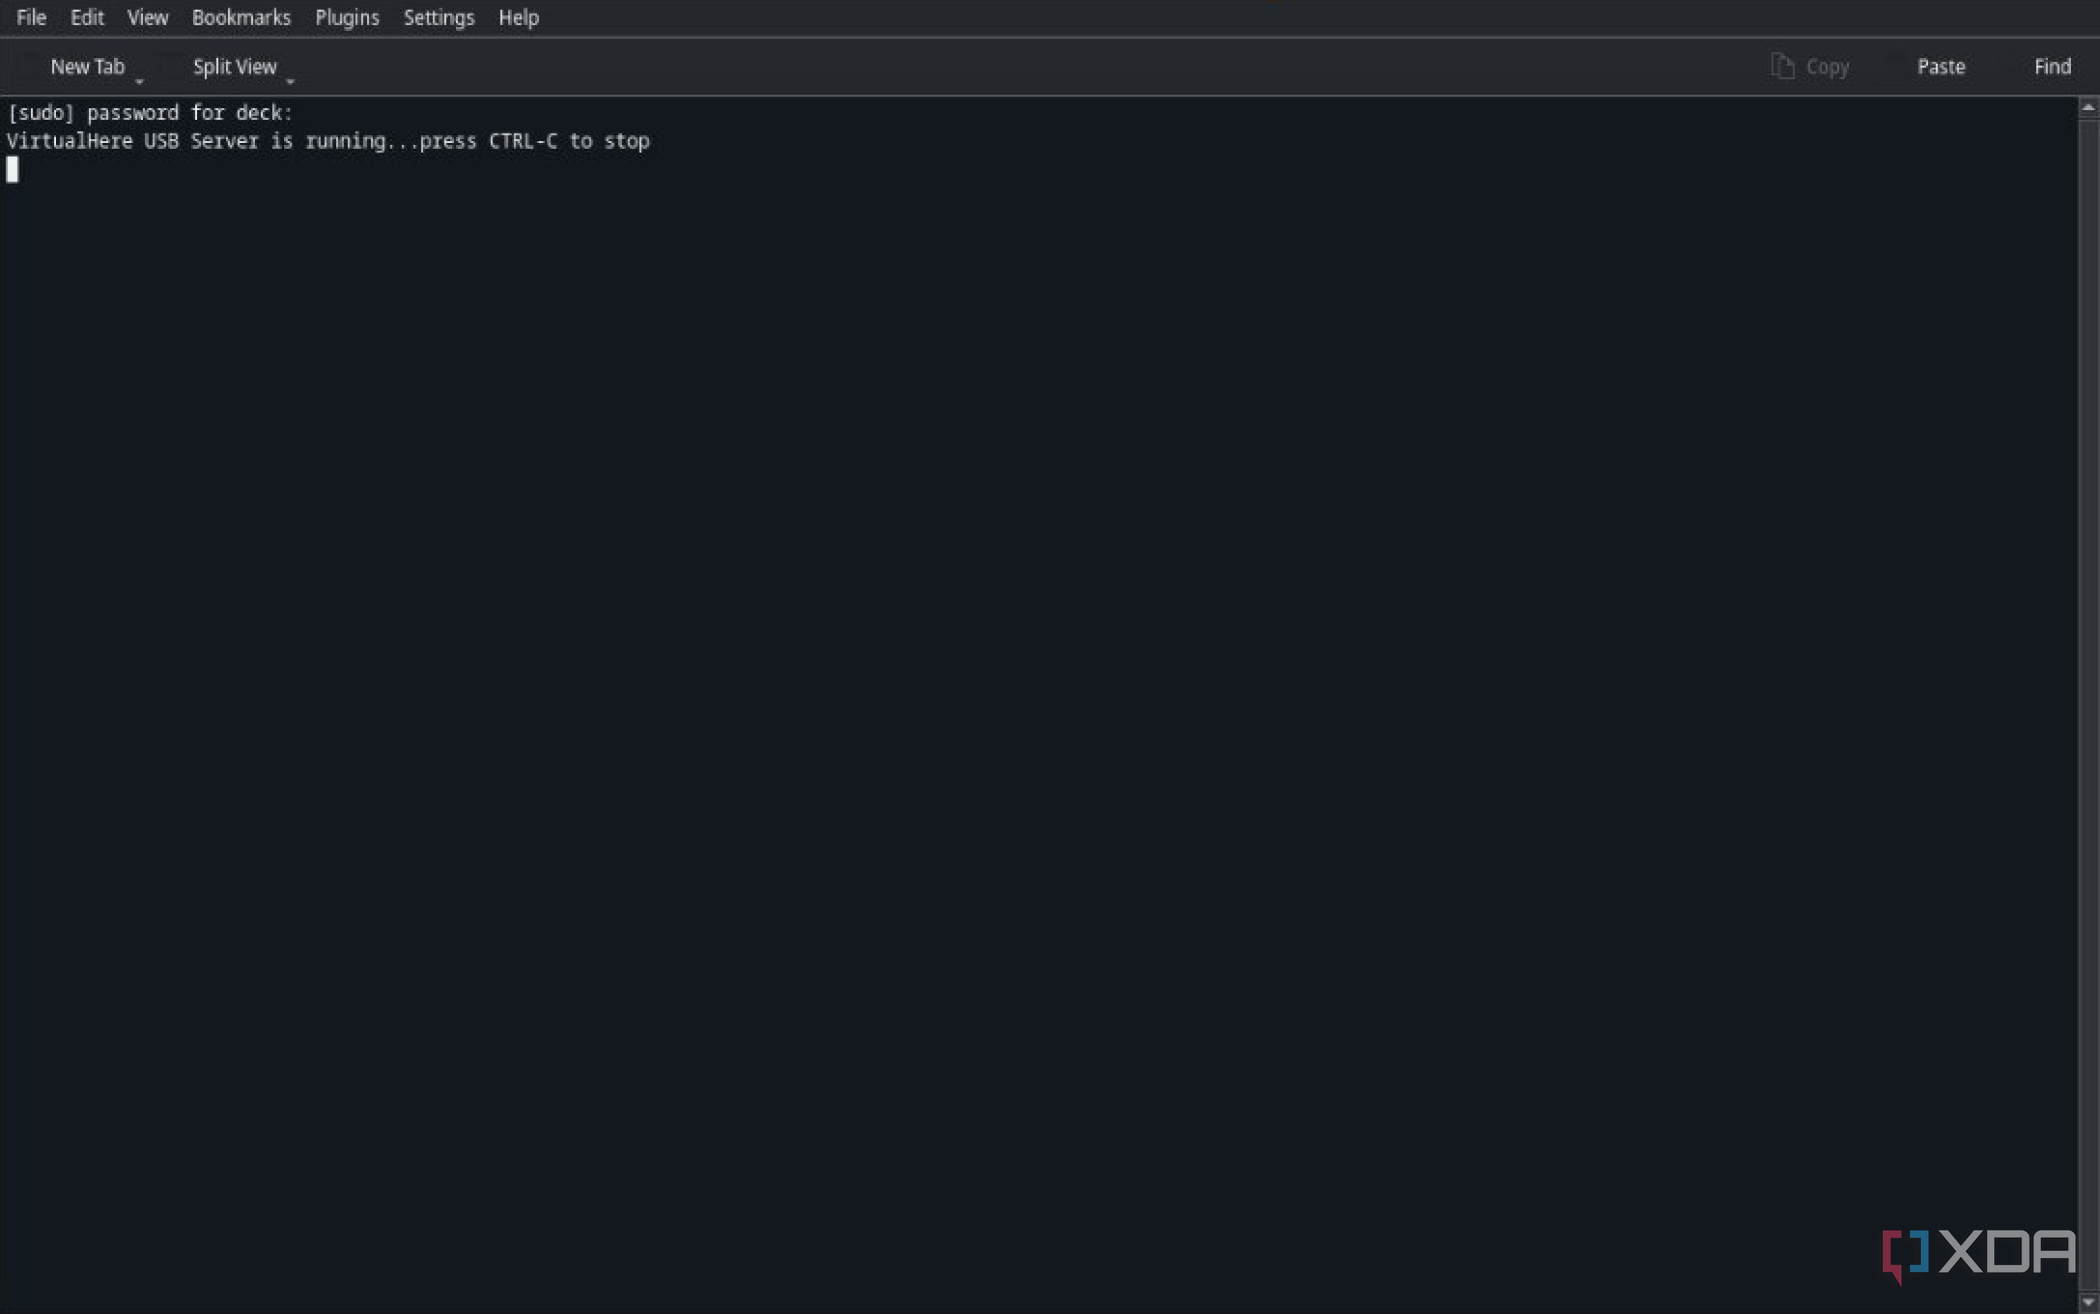
- Then, open the Controller app you set up on your Deck. You'll need to enter your password, and you can pull up the virtual keyboard with Steam button + X. Don't worry if your password doesn't pop up in the window, that's expected.
- Download the VirtualHere Client for your PC's operating system.
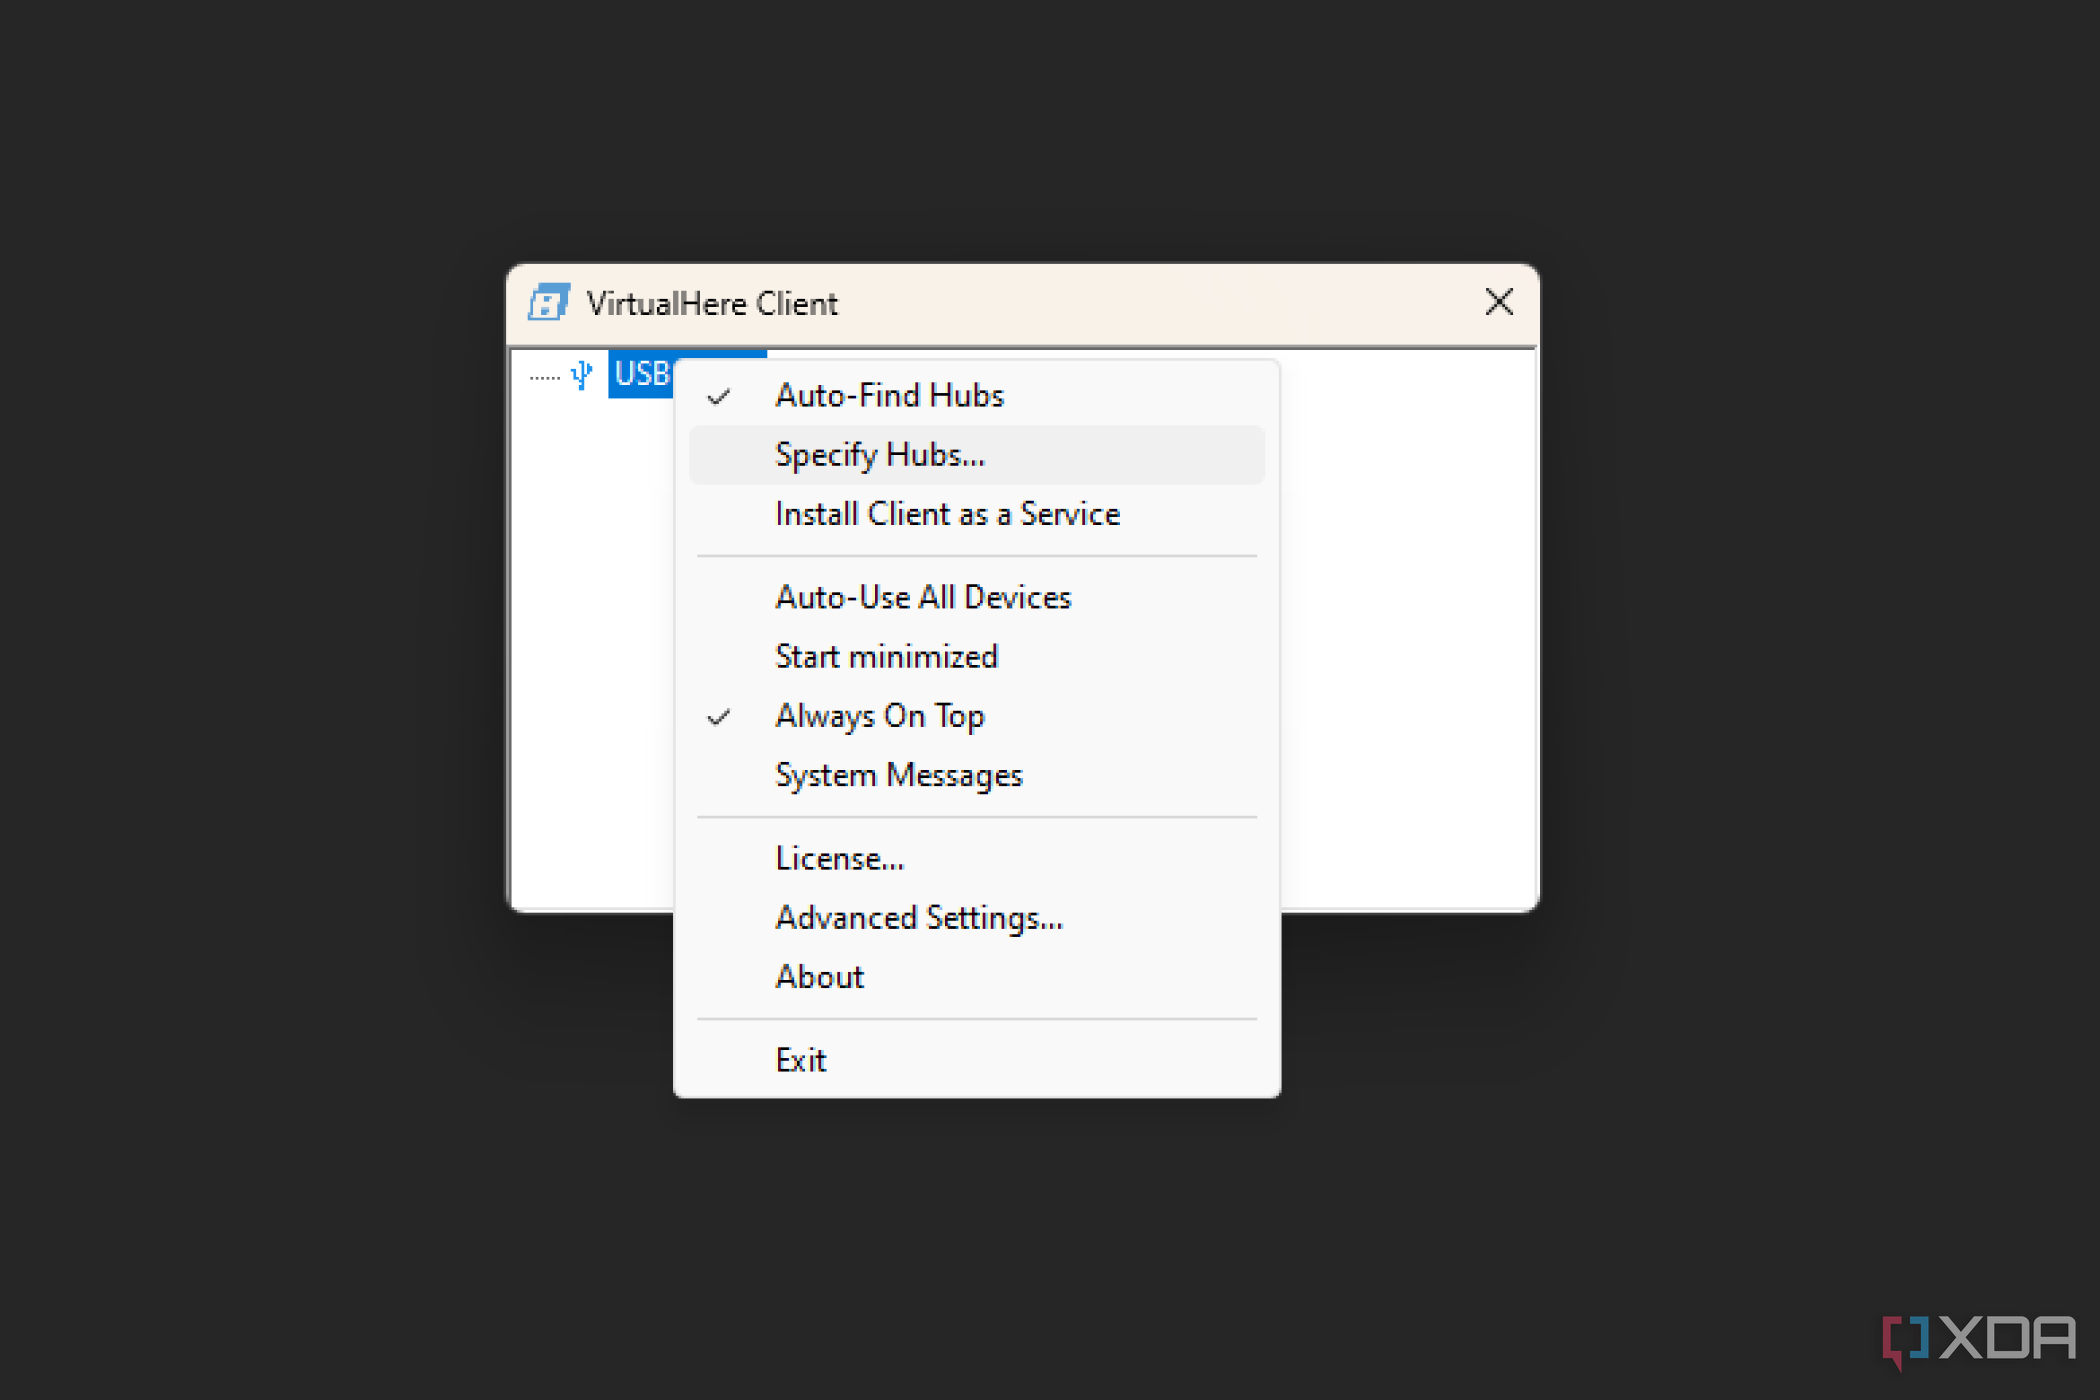
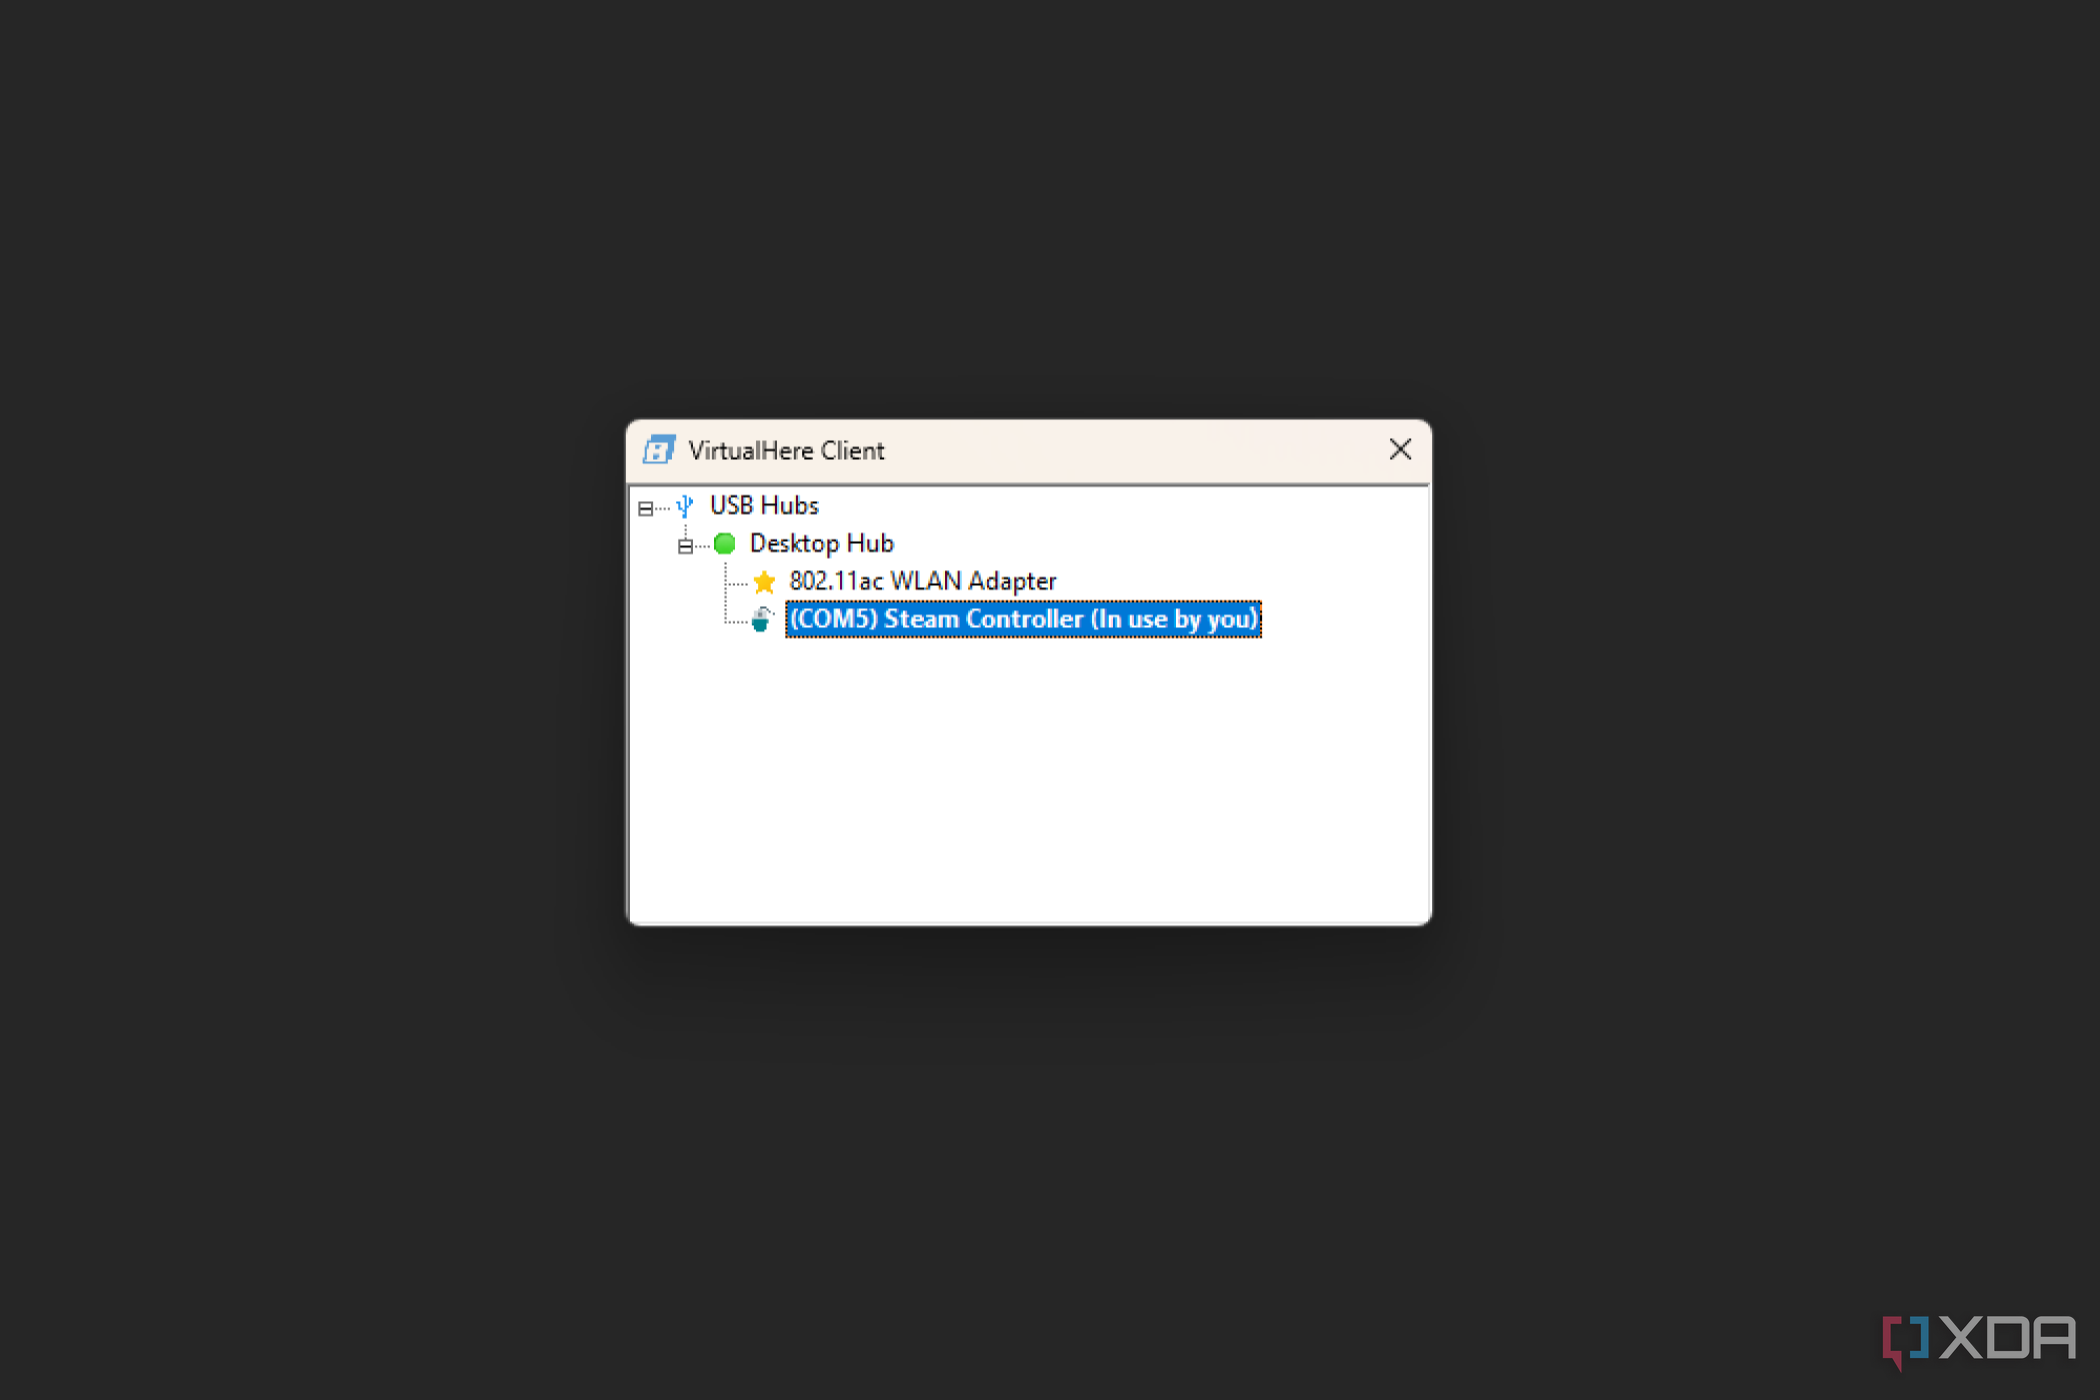
- Open the VirtualHere Client. At this point, you might see some stuff pop up under USB Hubs but you're not done yet.
- Right-click on USB Hubs and click Specify Hubs.
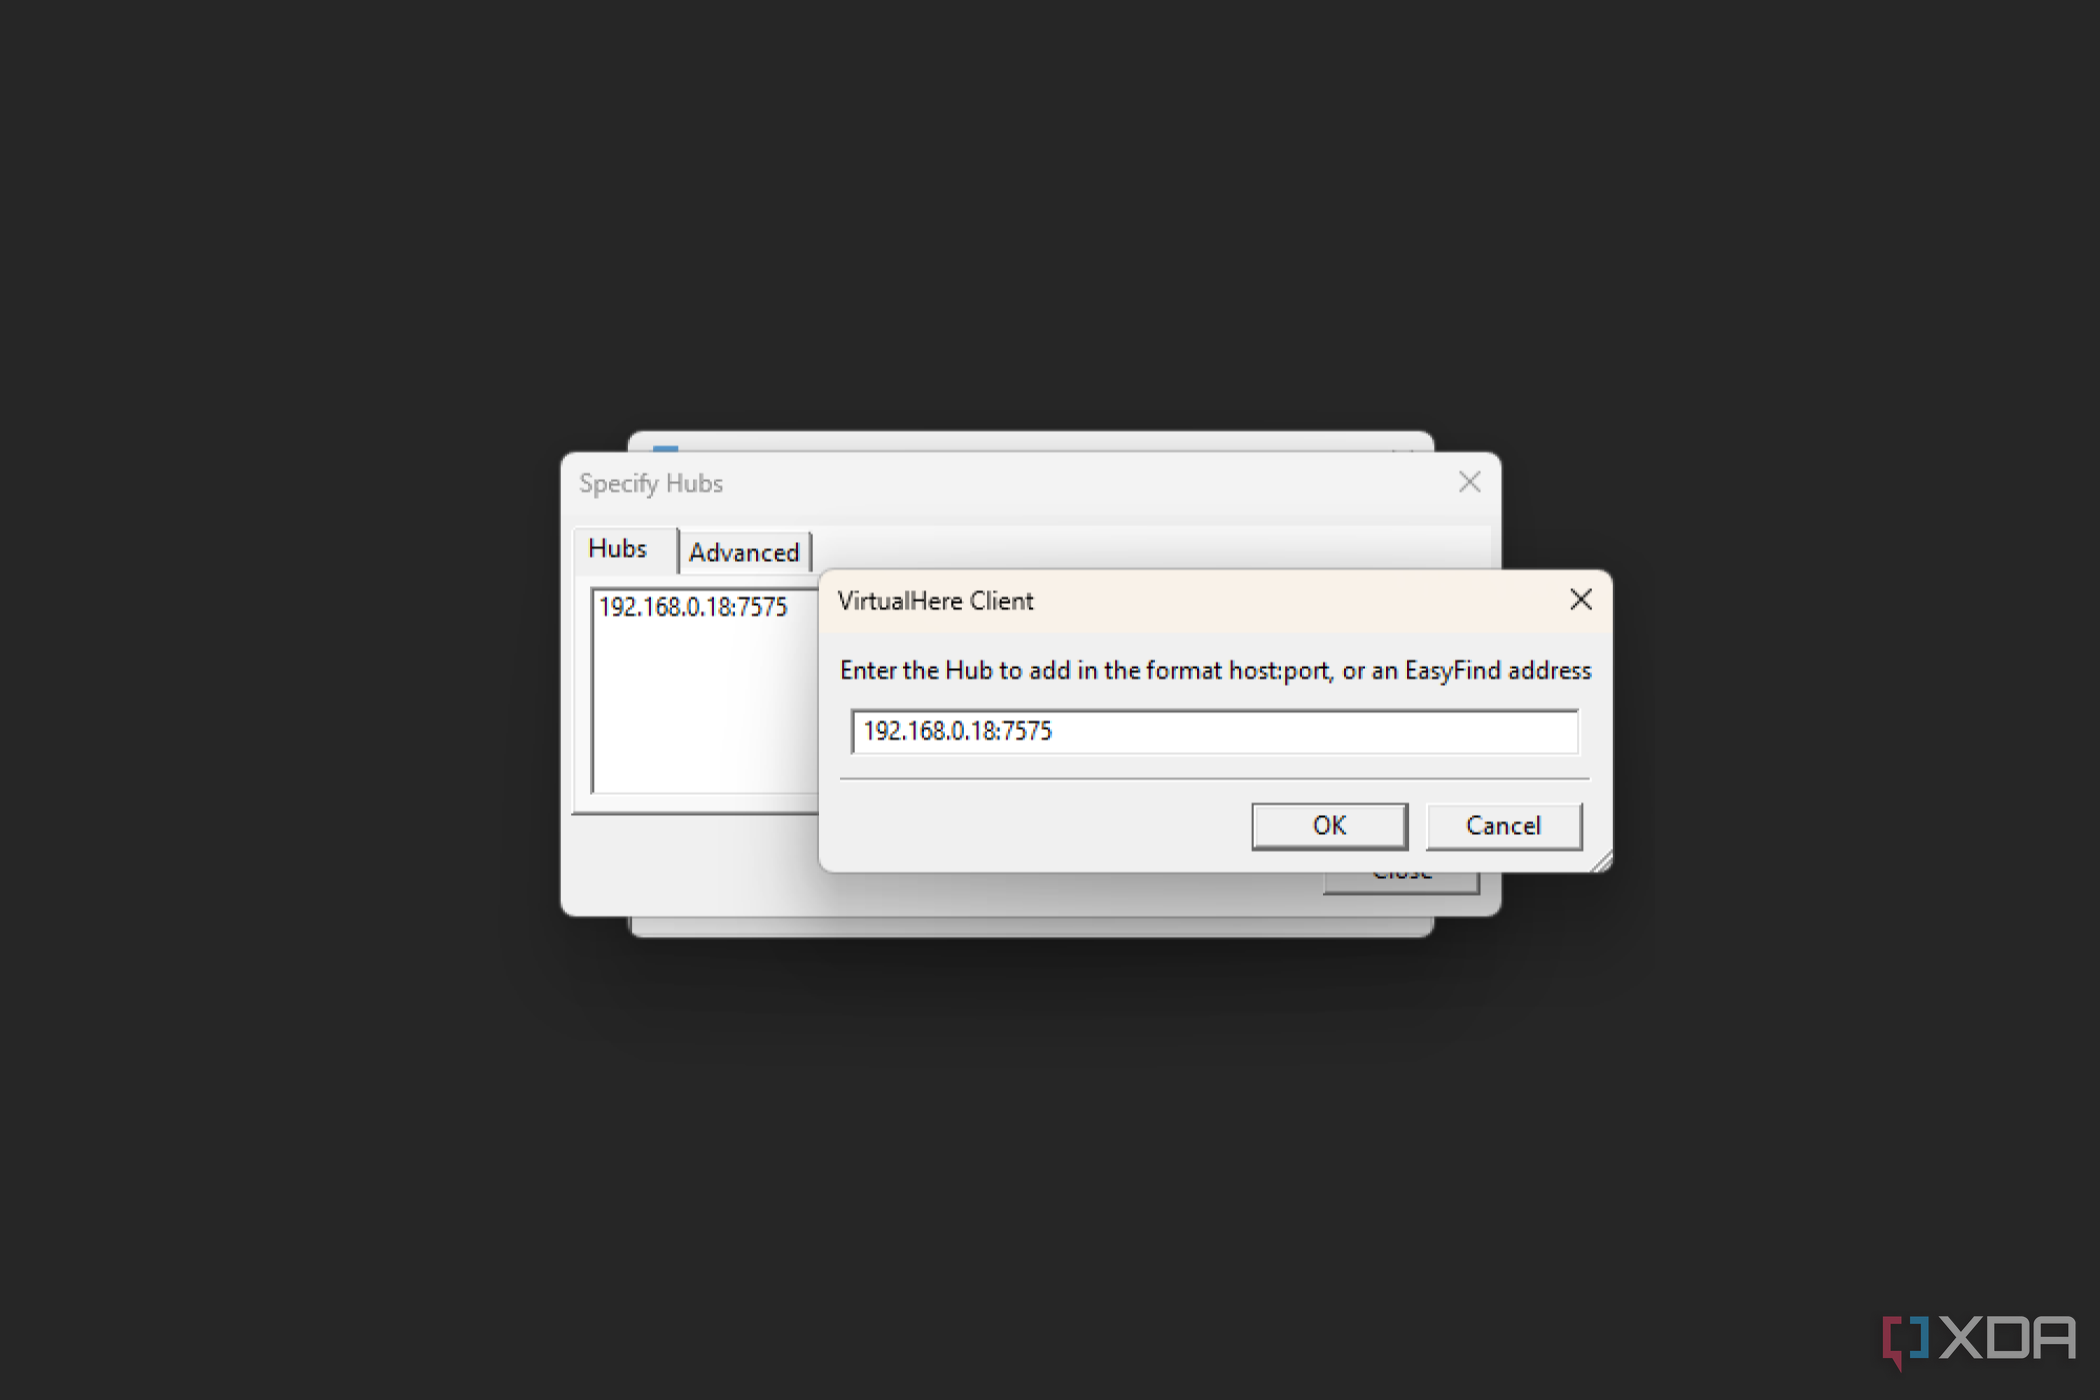
- Click Add and type in your Deck's IP address and add :7575 to the end of it.
- You should now see something that says Steam Controller. Double-click it, and now your Steam Deck will act like a normal Steam controller.
When you want to disconnect your Deck from your PC, right-click on USB Hubs and click Exit. Then, on your Steam Deck, you can press the Steam button and click Exit Game. If the Deck is unresponsive even after disconnecting, you will have to restart the Deck by holding down the power button and tapping Restart.
Overall, this method works pretty well all things considered, though it's not perfect, and most of the problems come from the Deck itself. Having to enter a password every time you open up the controller app is annoying, and exiting the controller app can force a restart, which is even more annoying. Still, it has benefits over Remote Play and is arguably better for people looking to play games off Steam.
Using the Steam Deck as a controller is great, but not seamless
No matter what method you choose, you'll have a good but flawed experience. Remote Play is hard to use on weak networks, and VirtualHere is just janky in general. Plus, since using the Deck like a controller has the same problems the Wii U GamePad had; it's just not ideal to use such a large device as a controller, and its high power consumption means you'll definitely want a good charger for it.
Nevertheless, the experience is still good overall with either method, and if you want to use a great controller on PC, this is definitely a good way to do it if you already have a Steam Deck. If you're planning on using your Deck as a controller, then you might want a good case for it just in case you drop it.

