
Quick Links
You probably already know that Microsoft has the Windows Insider Program, so you can beta-test early versions of Windows 11 on a great laptop or a great Windows desktop, or even in a virtual machine. Each of the channels of the program gets you access to the various versions of Windows. Unfortunately, though, Microsoft often likes to A/B test Windows features in the Windows Insider program.
A/B testing is part of a controlled feature rollout, where not everyone has access to new features right away and things are rolled out gradually in order to gather proper feedback on features. So, if you're eager to try a new Windows feature, and you don't have access to it yet, you're going to need ViVeTool, a third-party tool, to force-enable what you want to try.
Most of the experimental functionalities in Windows 11 are now being pushed to Windows through a core OS component called the Windows Feature Store that controls the gradual rollout. Since the Windows Feature Store is heavily protected by the Windows kernel, you can't use typical binary patching techniques to forcibly enable such features. This is where ViVeTool comes into play. Even if you aren't a developer, and you're reading this article, there's a good chance you've probably used ViVeTool once or twice to get some features ahead of the public rollout. But that isn't all the Windows Feature Store can be fiddled with. Here's how to activate and use ViVeTool.
A primer: Understanding the Windows Feature Store
In Microsoft's nomenclature, a "feature" in a modern Windows OS is a UI and/or UX change — from having the revamped Open with menu to the Task Manager entry in the taskbar context menu. As mentioned earlier, the A/B feature experiment mechanism found in Windows 10 and newer is controlled by the Windows Feature Store. This store (internally referred to as "Velocity") is part of the mostly undocumented Windows Notification Facility (WNF), a kernel component used to dispatch notifications across the system, including other kernel components, system services, and user-space applications.
Building the modular infrastructure of various features is essentially a way to design a controlled rollout model. For instance, the Windows Insider Program is used to deliver work-in-progress functionalities to earlier updates, which are later patched incrementally and subsequently enabled for every user once it reaches the stability milestone. In case a particular feature contains a catastrophic bug or has a security flaw, it can be seamlessly disabled by the kernel.
The Windows Feature Store also safeguards the randomized experimentation process by protecting the feature switch states. Fortunately, it is possible to manipulate the data stored inside the Windows Feature Store. A number of talented developers have managed to reverse-engineer Windows' internal feature control APIs. To gain access to the Windows Feature Store, you can use apps like Mach2 by Rafael Rivera or ViVeTool by Lucas (aka thebookisclosed) and bypass the server-side A/B testing altogether.
Using the GUI version of ViVeTool

We want to start with something more novice. If you're not comfortable using the command line interface, you can also use a graphical fork of ViVeTool named ViVeTool GUI to search through and enable available feature IDs for any Windows build.
Tinkering with the feature IDs can lead to instability or crashes. Because of interdependencies, some might break the core OS modules and make Windows entirely unusable. You could also come across some feature IDs, which make permanent changes that you can't revert. Proceed at your own risk. Due to how the Windows Update mechanism and the Windows Feature Store are correlated, changing certain features might be enough to put your device in an unsupported state. It's highly recommended to make an image backup before you're choosing to experiment with the Windows Feature Store. Alternatively, just evaluate in a virtual machine.
If you accept those risks. You can simply download the app and get started with the steps below.
- Open the ViveTool GUI GitHub page in your web browser of choice and download the latest release.
- Launch the installer.
- Follow the steps on your screen.
- Once the app is installed, launch it.
- In the Select Build section on the left, select the build you have installed.
- Allow the list to populate. It could take a few minutes.
- Search for the feature ID for a specific feature you want to enable. As an example, 44774629 is for Windows Copilot (though multiple flags may be needed for the feature to actually work). The developer of Mach2 maintains a list of feature IDs for each Insider build. The repo also contains the changes between builds, which can be useful for identifying new hidden features.
If you're looking for a more specific feature to enable, you can choose the Manually change a feature option. Then, enter the value in, and change it to whatever value you want. This can also be useful if your build hasn't been added to the database yet.
- Press the Perform Action button and choose Activate Feature. Press Close.


Once you press Close, you might have to restart your PC a few times to have the change apply.
Using the command line version of ViVeTool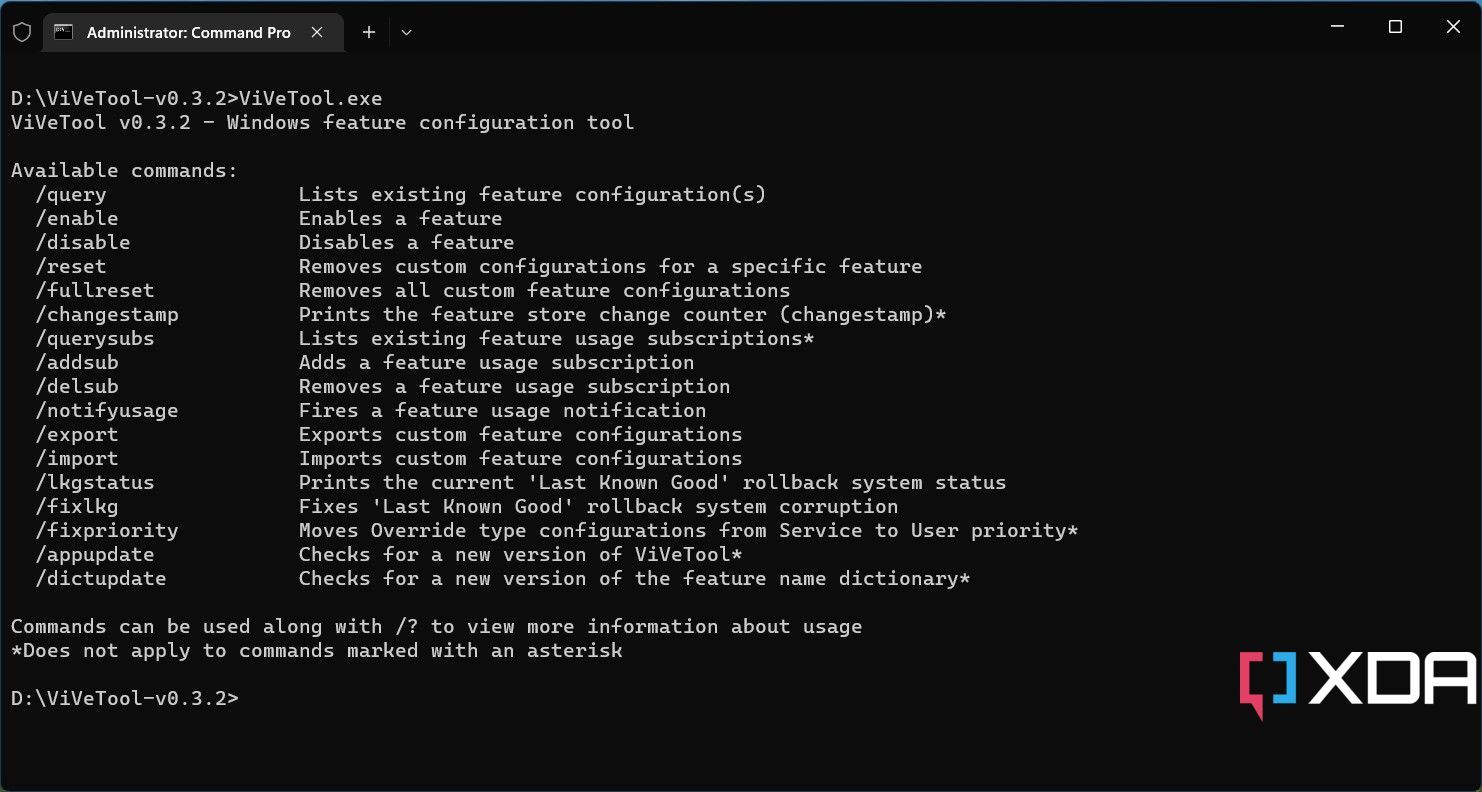
Now, for the more technical folks who are more comfortable with command-line tools. Each feature in the Windows Feature Store has a unique ID. There are three states of every feature ID: The developer of Mach2 maintains a list of feature IDs for each Insider build. The repo also contains the changes between builds, which can be useful for identifying new hidden features. Here's a look at the states. You'll be using ViVeTool to change these states.
- Default (0): This is the normal behavior for a particular feature.
- Disabled (1): This will completely disable the feature.
- Enabled (2): This will forcefully enable the feature.
All that said, here's how you can enable features with ViVeTool.
- Download the latest version of ViVeTool from its GitHub repository.
- Extract the archive to somewhere convenient.
- Press the Windows key + X on your keyboard and select Terminal (Admin) to launch an elevated shell window. You may also use PowerShell if you prefer, or stick with plain old Command Prompt with elevated privileges.
- Change the directory to the extracted ViVeTool directory. For example, if you have extracted ViveTool to D:\ViveTool, type
cd D:\ViveTool. - Locate the feature ID corresponding to the feature you want to enable from the table above. Then, execute the command:
vivetool /enable /id:xxx - If everything goes right, you should see "Successfully set feature configuration" in the console.
- Close the console window and restart your computer to make the changes take effect.
- If you change your mind and want to revert the change(s), repeat the steps above and replace
/enablewith/disablein the commands on step 5.


Additional features of ViVeTool command line
ViVeTool is literally the "Swiss army knife" when it comes to the Windows feature control APIs. Apart from toggling the state of Windows features, it can query the existing feature configurations of the underlying Windows build, import/export/reset the custom configurations, and even help to identify the last known good rollback system status. To know more, open a Terminal window and run the ViveTool executable without any argument. The app will list all the commands and their usage. This includes enabling or disabling a feature, and listing the existing feature configurations.