Drivers are one of the most critical parts of Windows 11. They are what power your laptop and basically any PC. A driver is part of the software on Windows that helps your PC communicate with something that might be connected to it. That could be the display, a USB drive, a keyboard, or even the trackpad.
Sometimes, however, when you download and reinstall Windows 11, you might run into issues with drivers. Even generally, when you attach a device to your PC, there's a chance there might not be a driver for it, and it won't work correctly. In these situations, you'll need to update your driver, or manually install one. There are three ways, via Windows Update, your OEM website, or via Device Manager. We'll also cover how you can uninstall drivers, too though you'll have to be an administrator to go through the steps in this guide.
How to install and update drivers via Windows Update
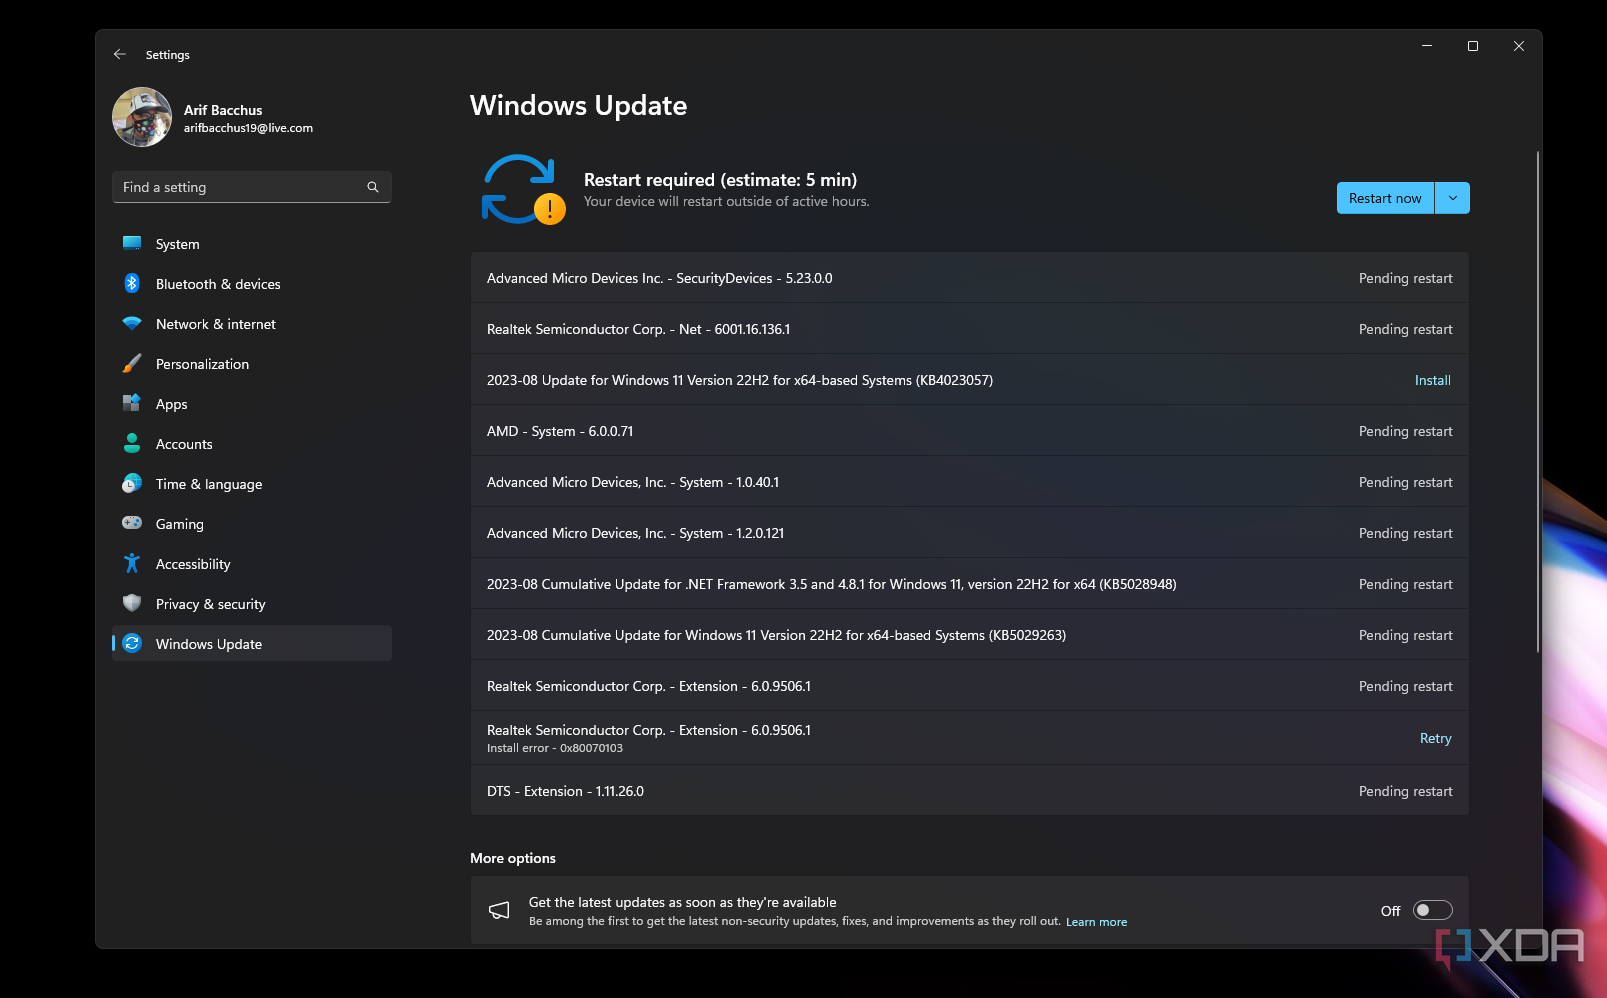
Most times, if you're running into issues with drivers, Windows Update will be the place to go. Just like how you check for monthly security updates, Windows will use Windows Update as a way to grab new drivers for your PC, as distributed by the company that made your device.
- Open the Windows 11 Settings app with Windows Key and I.
- Choose Windows Update.
- Press the Check for Updates button. Windows will check for updates.
- You should see a list of drivers appear, Windows will download them one by one. If prompted, press Download to download it.
- Sometimes, you might also see driver updates and other updates as optional. In these cases, you can click Advanced Options and then choose Optional Updates. Then choose Driver Updates, and then click Download and Install.
- If a driver doesn't download, try the Retry button.
- When ready, Windows will prompt you to restart to install the driver.
How to install and update drivers from an OEM website
When Windows Update doesn't show you a driver that you think your PC needs, you can manually download and install a driver by visiting the OEM website for your PC. An OEM is who made your PC, like Dell, Lenovo, HP, and so on. You can visit support websites for your OEM and search for the model of your device to find the proper drivers.
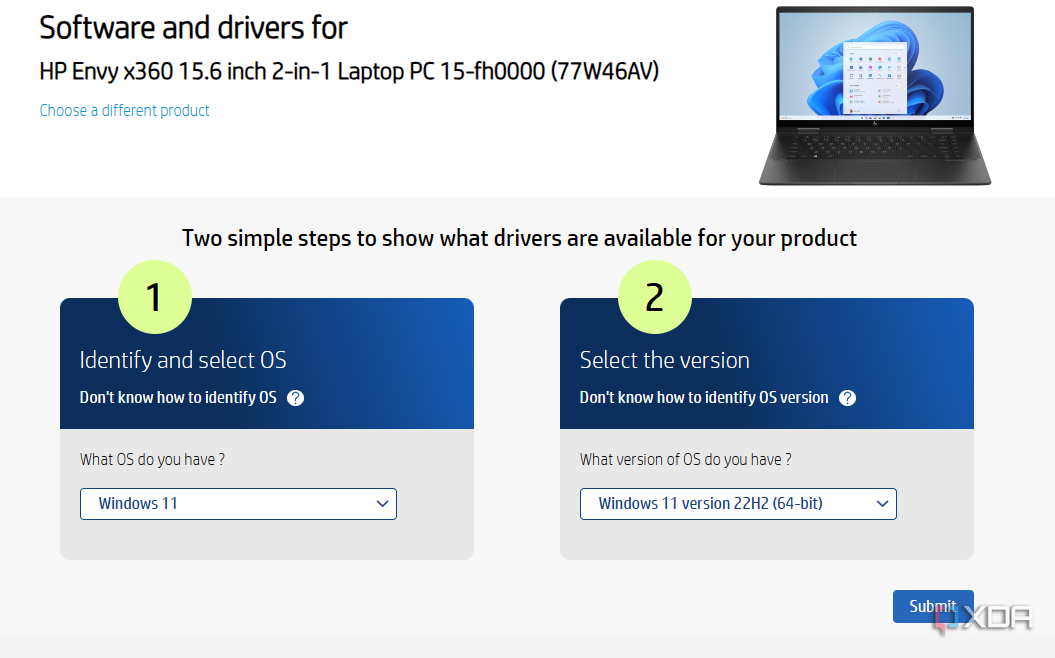
Just as an example, we're using HP. Steps should be similar for other OEMs, too. But in any case, you're going to have to download the drivers first, preferably from the official source rather than a third-party website.
- Visit the support page for your OEM. If you can't find it, we suggest visiting Google to find the support page for your OEM.
- Choose your product, enter in your serial number, or run the detection software distributed by your OEM.
- Select your product to confirm it.
- If prompted, select the version of Windows your device is running.
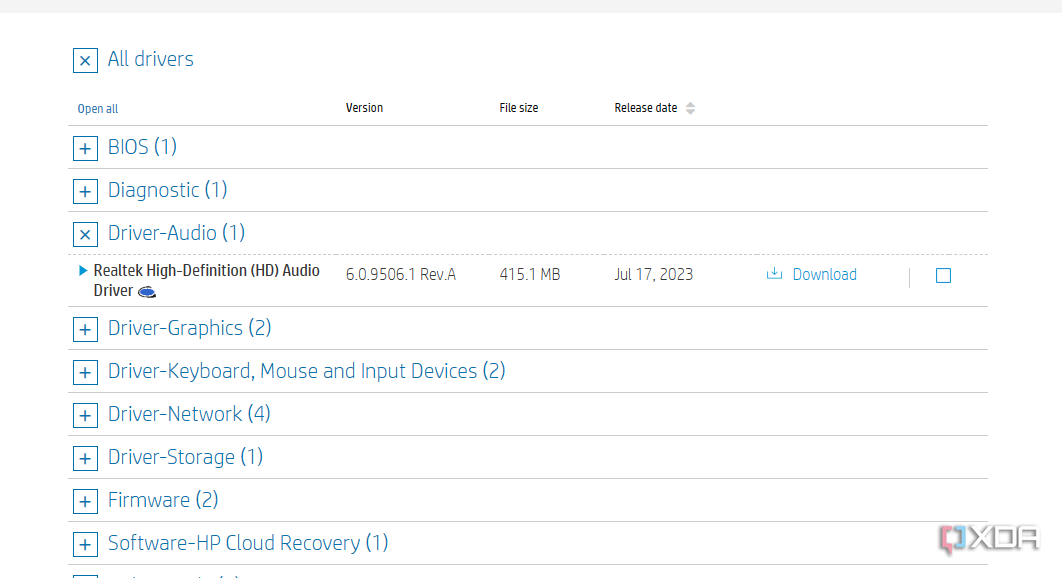
- Find the driver you need, and choose Download.
- Once the file is downloaded, double-click to launch it and install it. If double-clicking the file doesn't do anything, skip to the next section for a manual install.
How to update graphics drivers
Also of note is updating graphics drivers on Windows. Graphics drivers are something you'd want to update manually on your own since you'll get more recent optimizations than what the OEM or Windows Update might provide. Our guide to updating graphics drivers has more, but a condensed version is below.
- On Intel systems, use the Intel Driver and Support Assistant. Or manually downloading drivers from their website by downloading, double-clicking, and installing them.
- On AMD systems, use AMD's download center for graphics, and choose the auto-detection tool. For a manual download, choose your hardware, download the file, and double-click to launch it.
- For updating NVIDIA graphics, use the NVIDIA GeForce Experience software. For manual download, use the Nvidia download center.
How to update drivers via Device Manager
Finally, we're going to talk about how you can update and install drivers through Device Manager. There are both automatic and manual methods here. Most times, the automatic method should resolve most issues. But if that doesn't work, you can manually update a driver. Here's what to do.
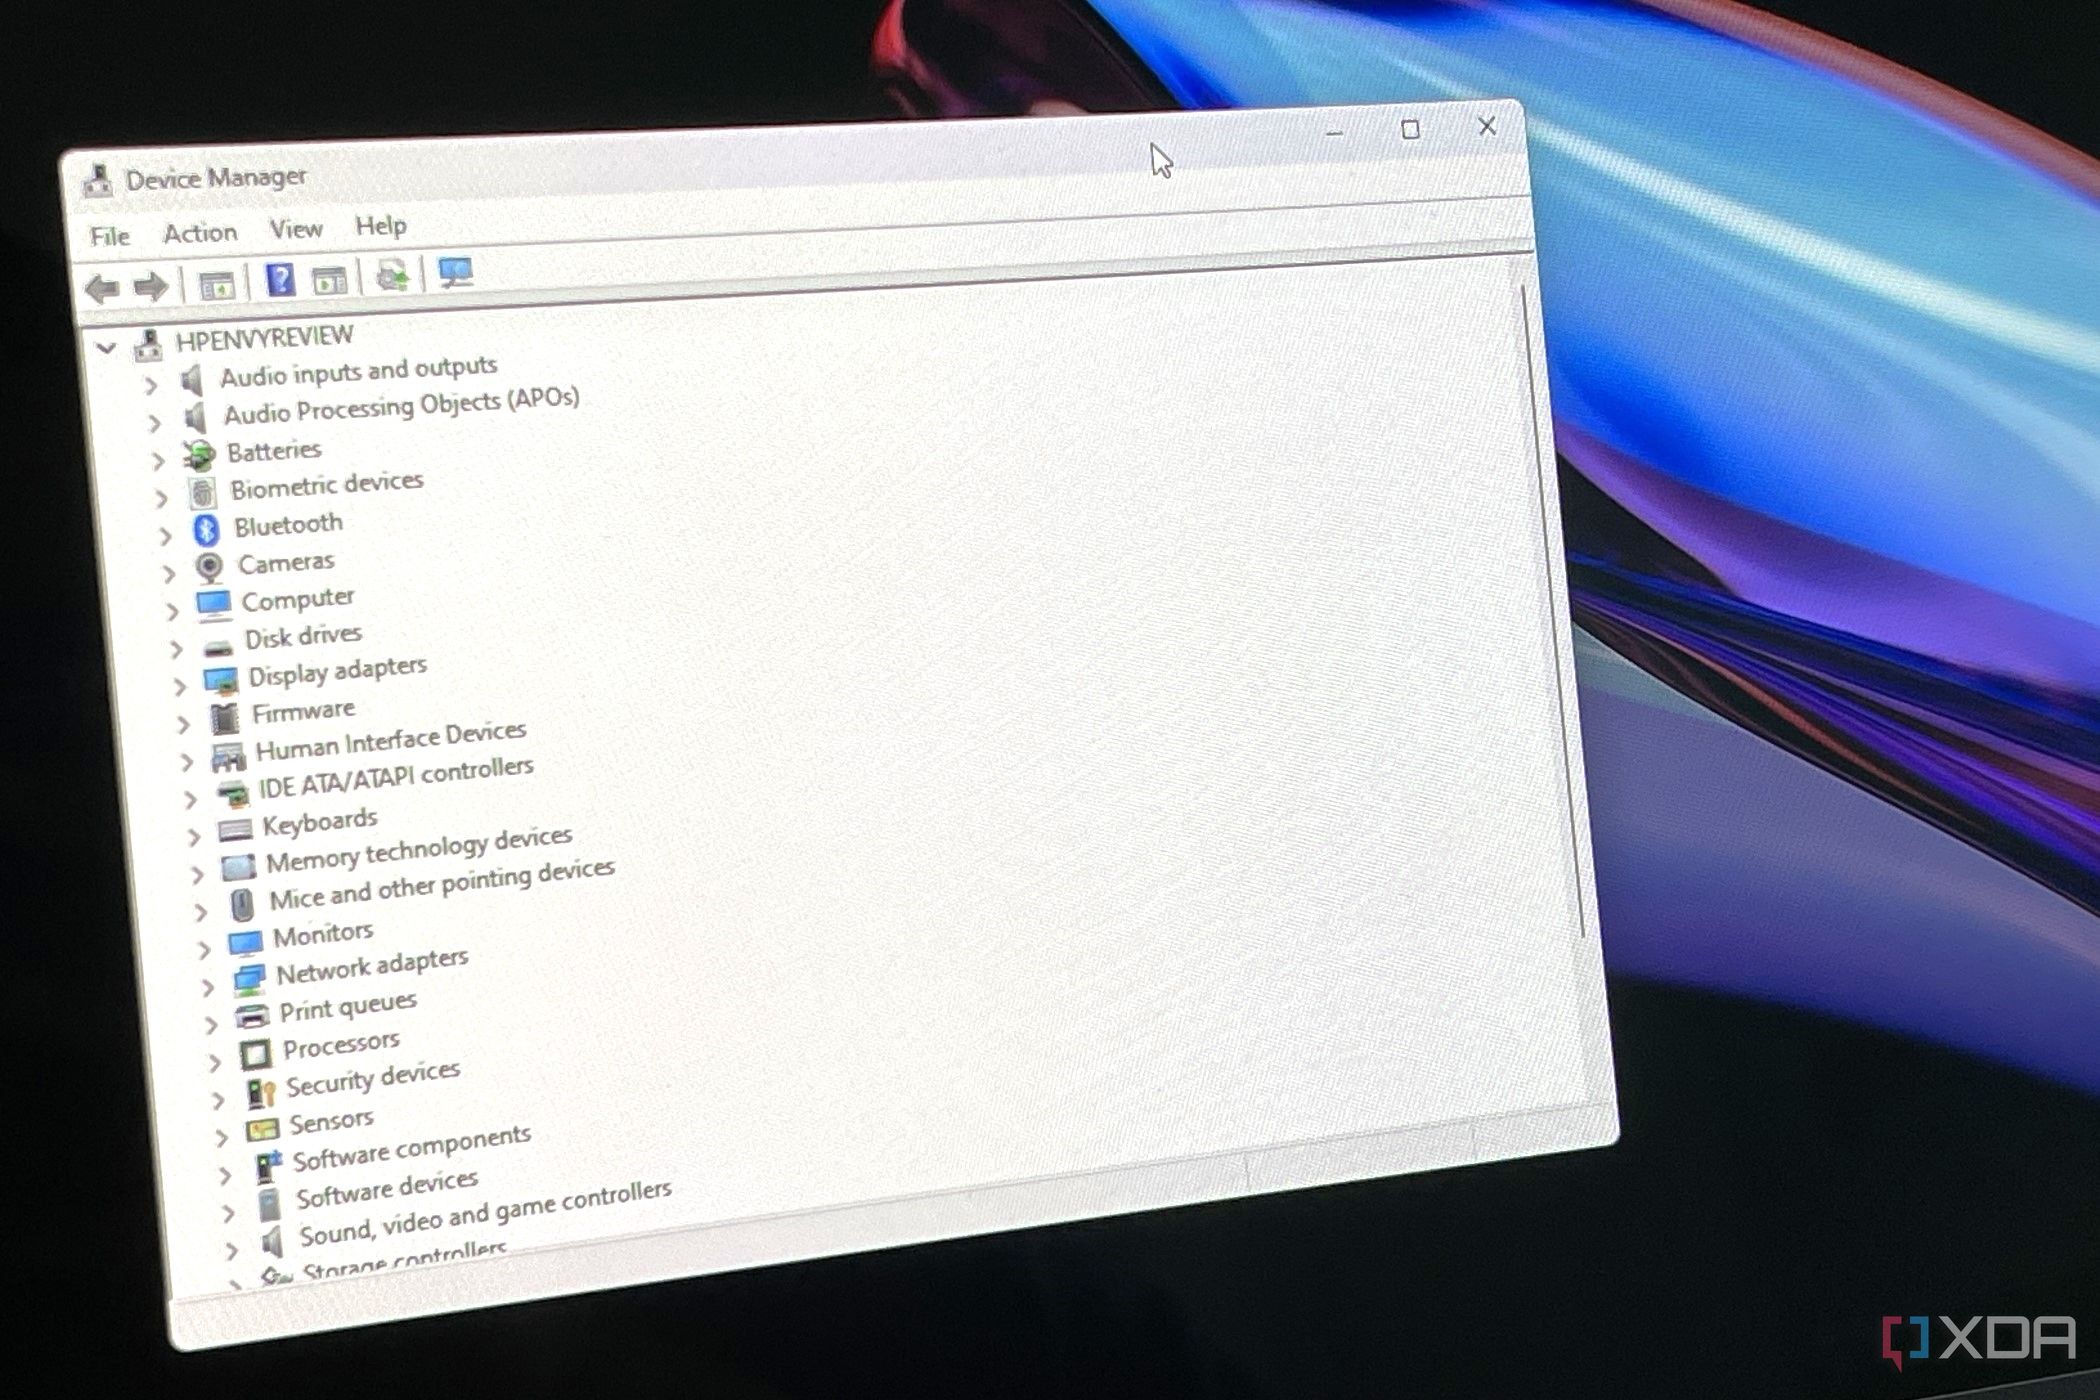
- Right-click on the Start Menu and choose Device Manager.
- Allow the list to populate.
- Expand each of the categories, and look for any errors. A driver will be marked with a red (X) to show a driver is missing. Drivers that need updating, or your attention will have a yellow (!).
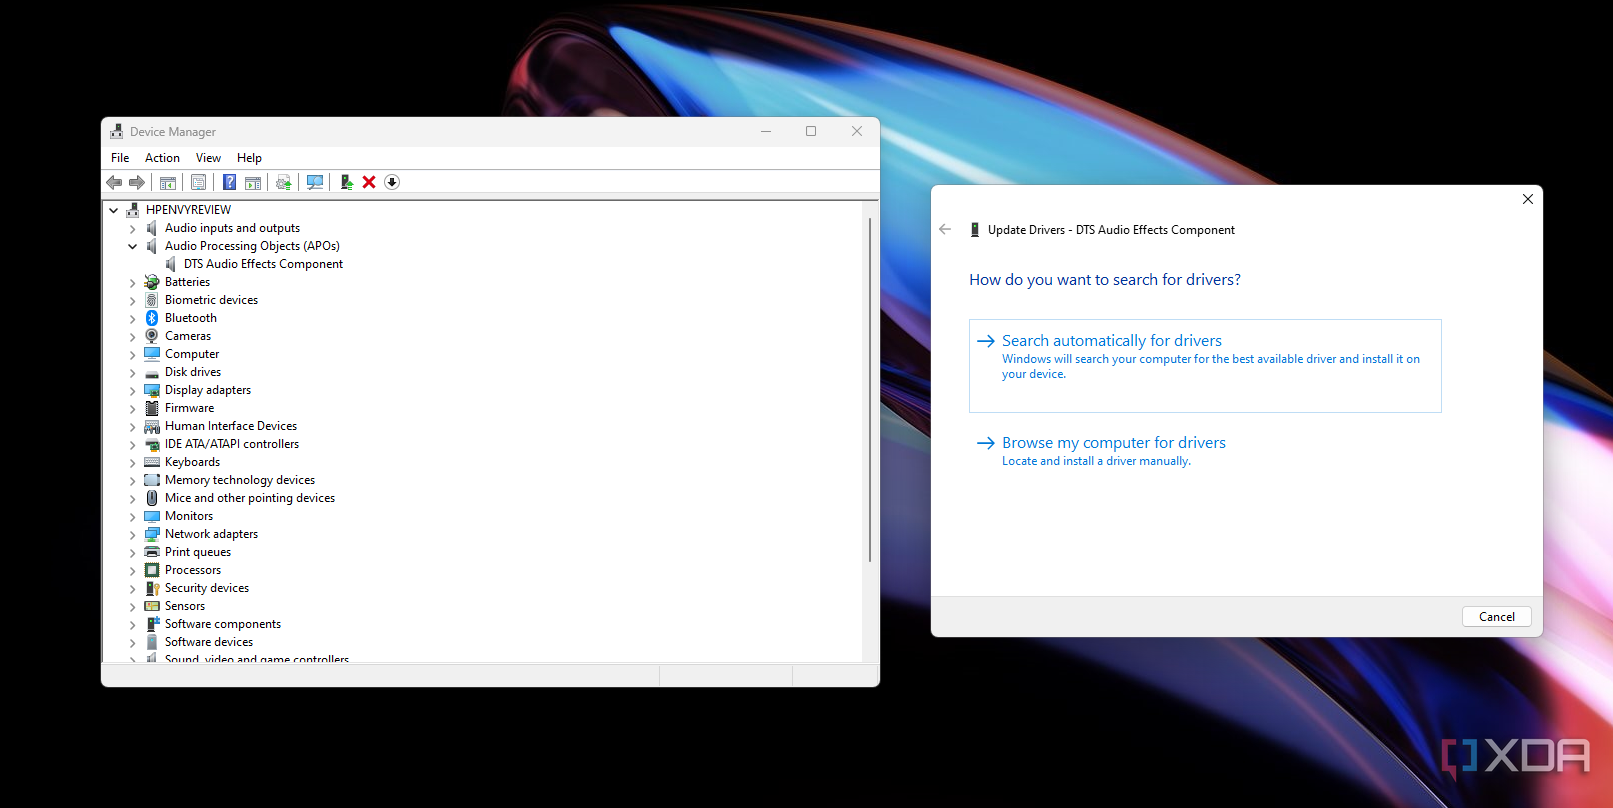
- To update the driver automatically, right-click on it and choose Update Driver. Then choose Search automatically for drivers. Most times the driver will be updated. But if not, you'll be prompted to go to Windows Update.
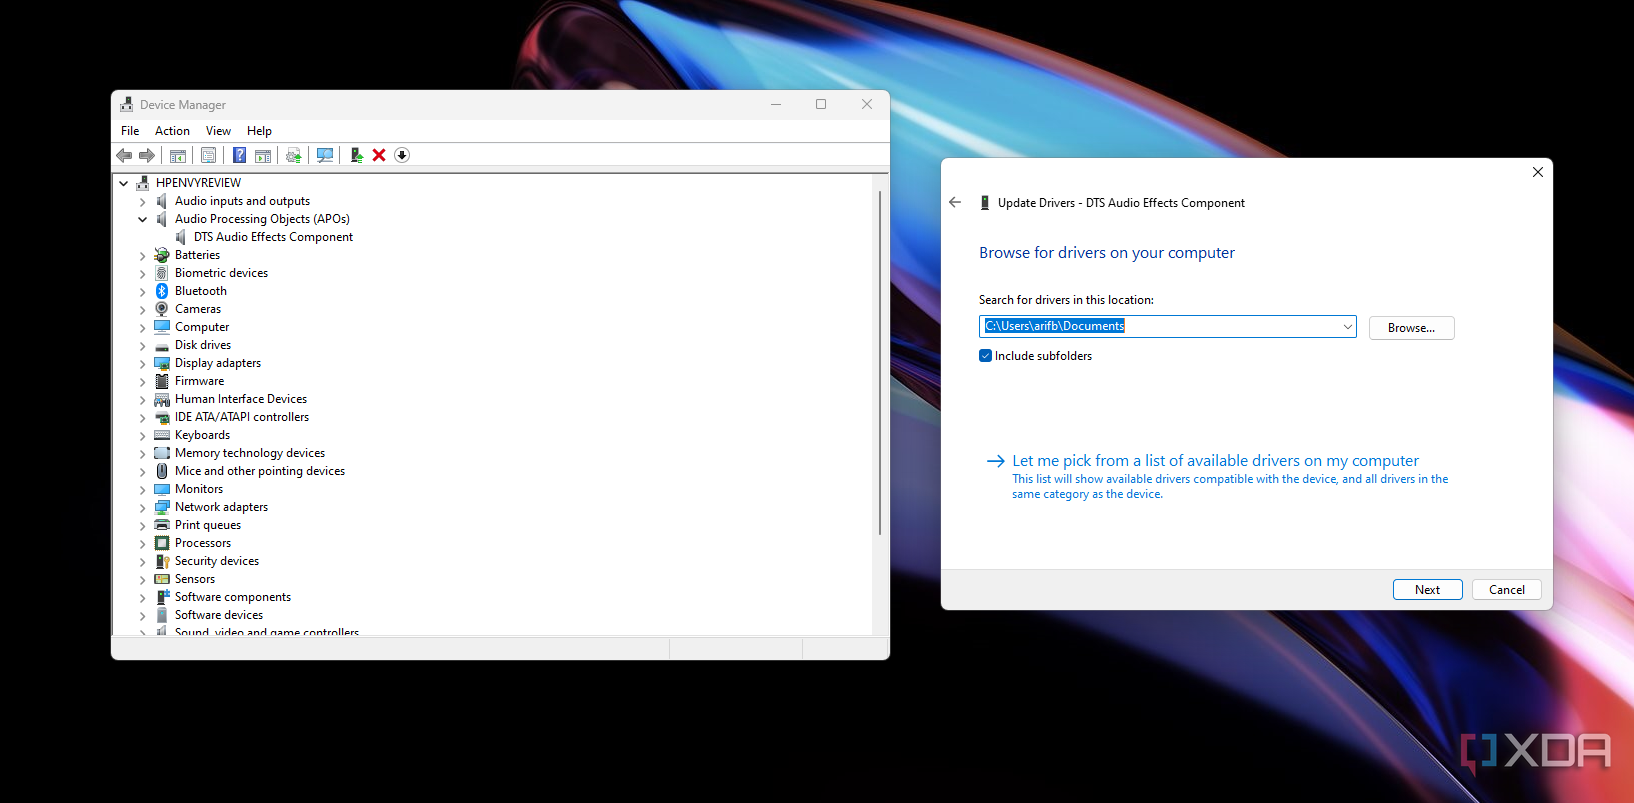
- To update the driver manually, right-click, and choose Browse My Computer for drivers. Then, navigate to the specific driver that you might have downloaded in the previous section and press Next. Windows will install it.
If a specific driver is giving you an issue, you can uninstall it and try to reinstall it. This can be done by right-clicking on the driver and choosing Uninstall device. You also can choose Disable device should you want to disable it. In all cases, it's good to choose Scan for hardware changes to scan for any new changes, too, and then follow the steps above to try and get your drivers working properly.
If you're looking for additional Windows 11 tips, you might also be interested in how you could use and manage multiple monitors. Or if you made a change to your PC, you can learn more about how to activate Windows. And want to be running the latest and greatest versions of Windows 11? You can check out how to get new features in Windows 11.

